Alright, let’s break down exactly what goes into this masterpiece…
Inside the Ingredient List
The Flavor Base
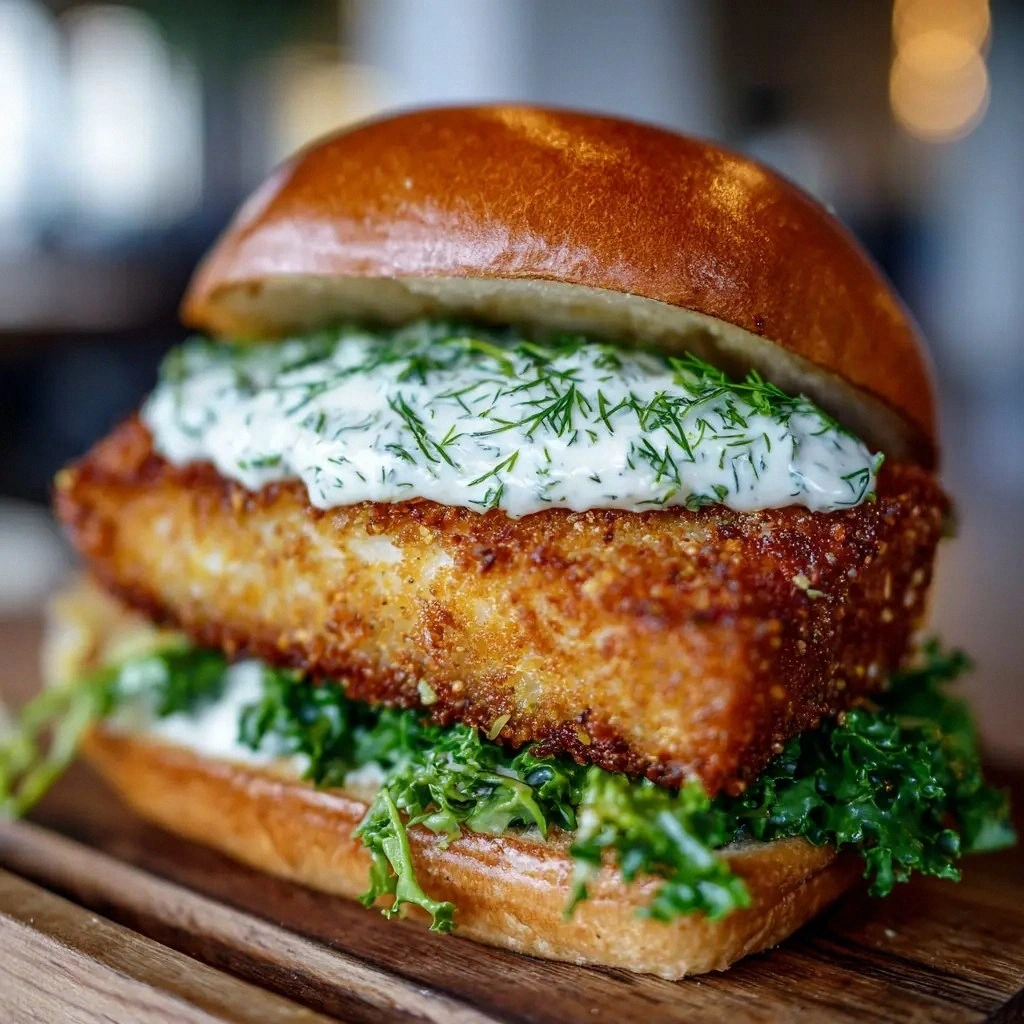
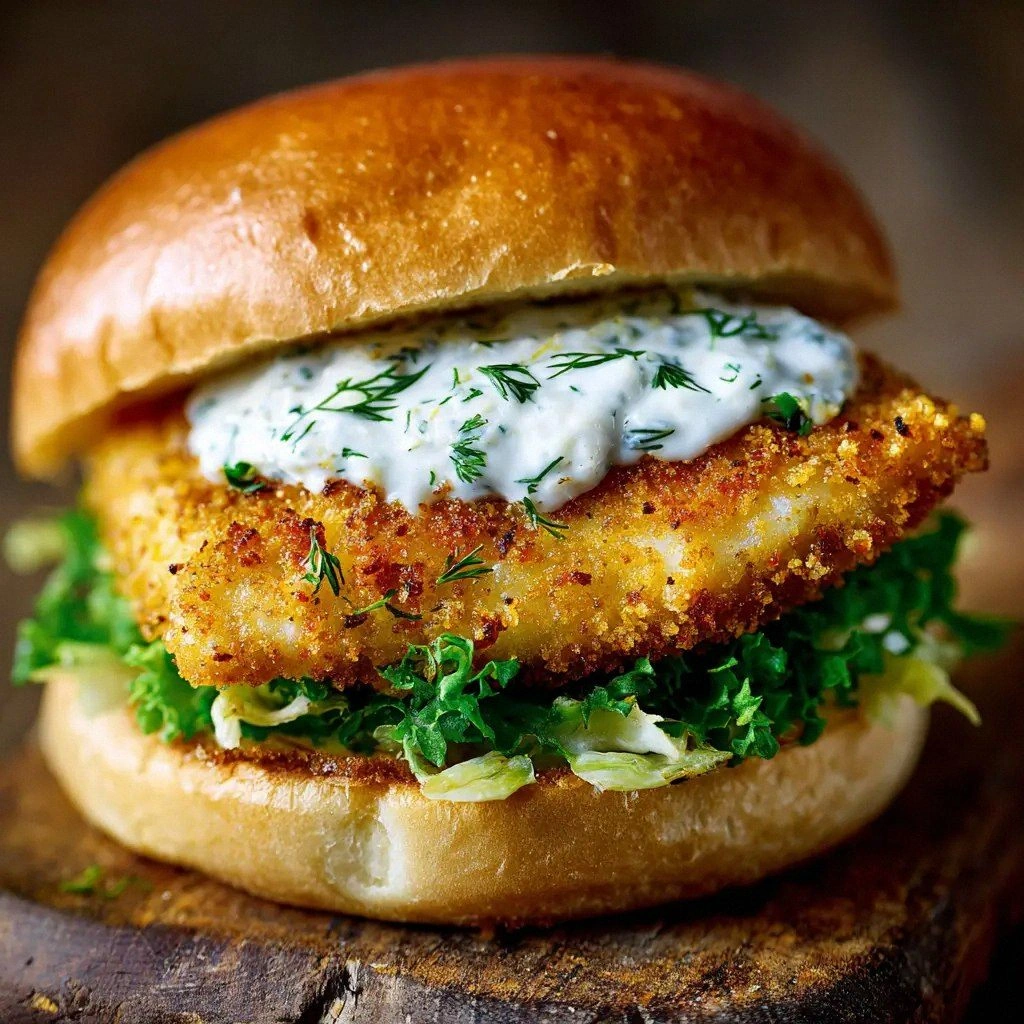
The beer batter is the backbone of this sandwich. The cold beer not only creates a light, airy coating but also imparts a subtle hop flavor that enhances the fish’s natural brininess. Without the beer, the batter would be heavier and less crisp. If you skip it, you’ll lose that unique depth and the sandwich will feel flat.
The Texture Crew
Flour and cornstarch work together to give the batter its structure. Flour provides the bulk, while cornstarch adds a delicate crunch. Together, they form a coating that crackles when it meets hot oil. Skipping cornstarch will result in a denser crust that can feel heavy on the palate.
The Unexpected Star
Dill pickles and capers might seem like odd companions for fried cod, but they bring a bright, briny punch that cuts through the richness of the fish and the buttery bun. The pickles add a subtle sweetness, while the capers provide a salty, tangy bite. If you omit them, the sauce will lack the complexity that makes this sandwich memorable.
The Final Flourish
The dill‑caper sauce, made with mayonnaise, fresh dill, lemon juice, and Dijon mustard, is the finishing touch that ties everything together. It coats the sandwich like velvet, adding a creamy, tangy layer that balances the crunch. This sauce also helps keep the bun from becoming soggy, as it forms a barrier against moisture.
Everything’s prepped? Good. Let’s get into the real action…
The Method — Step by Step
- Begin by patting the cod fillets dry with paper towels. This step is crucial; excess moisture will cause the batter to splatter and the coating to be soggy. Season both sides with salt and freshly ground black pepper. Then set the fillets aside while you prepare the batter.
- In a large mixing bowl, combine the all‑purpose flour, cornstarch, paprika, garlic powder, and onion powder. Whisk until the spices are evenly distributed. The dry mix should look like fine sand, ready to absorb the beer.
- Beat the egg in a separate shallow dish. Pour the cold beer into a third bowl, then whisk the egg into the beer until fully blended. This creates a liquid batter that will coat the fish evenly. The beer’s carbonation will lift the batter, making it lighter.
- Dip each cod fillet into the beer mixture, letting excess drip off. Then roll the fillet in the flour mixture, ensuring a complete coat. Shake off any loose flour and repeat the dip‑and‑roll process for a double coating. This double layer gives the sandwich its signature crunch.
- Heat neutral oil in a deep skillet over medium‑high heat. The oil should reach 350°F (175°C). Use a thermometer for accuracy, or drop a small breadcrumb into the oil; if it sizzles immediately, the temperature is correct. This ensures the batter cooks quickly and stays light.
- Carefully lower the coated fillets into the hot oil. Do not overcrowd the pan; fry in batches if necessary. Each fillet should take about 4–5 minutes, flipping halfway through. The edges will begin to turn golden and crisp, and the interior should still be moist.
- Use a slotted spoon to transfer the fried cod onto a wire rack set over a baking sheet. This allows excess oil to drain while keeping the coating crisp. Let the fish rest for a minute so the batter sets completely.
- While the fish is frying, assemble the sauce. In a small bowl, combine mayonnaise, dill pickles, capers, fresh dill, lemon juice, and Dijon mustard. Whisk until smooth, then refrigerate until ready to use. The cold sauce will keep the bun from becoming soggy.
- Toast the brioche buns lightly in a skillet or toaster oven. This step adds a buttery crunch that complements the fish’s crispness. Spread the dill‑caper sauce on the bottom bun, place the fried cod on top, add a slice of American cheese, then top with a leaf of lettuce. Finish with the top bun and serve immediately.
That’s it — you did it. But hold on, I’ve got a few more tricks that will take this to another level. From the moment you plate the sandwich, the aroma will convince you that you’re in a gourmet kitchen, not a home one.
Insider Tricks for Flawless Results
The Temperature Rule Nobody Follows
Many home cooks fry fish at a lower temperature, thinking it will cook the interior faster. In reality, this leads to soggy batter. The ideal oil temperature is 350°F (175°C). Use a thermometer or the breadcrumb test to maintain consistency. This simple rule guarantees a crisp exterior every time.
Why Your Nose Knows Best
The aroma of beer batter frying is an early indicator of doneness. When the scent becomes nutty and slightly sweet, the batter has reached its peak. If you hear a sharp, metallic whine, the oil is too hot and the batter will burn. Trust your nose as much as your eyes.
The 5‑Minute Rest That Changes Everything
After frying, let the cod rest on a wire rack for five minutes. This step allows the batter to set and prevents the interior from steaming, which would otherwise soften the crunch. A quick rest also lets the flavors meld, making each bite more harmonious.
Keep the Buns From Sogginess
The dill‑caper sauce is not only flavorful but also acts as a moisture barrier. Apply it generously on the bun before adding the fish. If you prefer a lighter sauce, use a mix of Greek yogurt and mayo for a tangy, low‑fat alternative.
Use Fresh Cod for the Best Texture
Fresh cod has a delicate, flaky texture that holds up well to frying. Avoid frozen fillets that have been thawed, as they tend to become mushy. Look for a firm, translucent flesh that resists flaking when pressed.
Make the Batter Ahead of Time
If you’re short on time, prepare the batter in advance and store it in the refrigerator. Cover the surface with plastic wrap to prevent oxidation. When ready to fry, simply dip and coat the fish; the batter will still perform beautifully.
Creative Twists and Variations
The Spicy Cajun Kick
Swap the paprika for a Cajun spice blend and add a splash of hot sauce to the batter. The fish will have a smoky, peppery heat that pairs well with a cool cucumber slaw. This version is perfect for summer barbecues.
The Mediterranean Flair
Replace the dill pickles with sun‑dried tomatoes and add fresh oregano to the sauce. The result is a tangy, herbaceous sandwich that feels like a seaside lunch. The cheese can be swapped for a slice of feta for a briny twist.
The Asian Twist
Infuse the batter with a dash of soy sauce and a pinch of ginger. Top the sandwich with a slaw of shredded cabbage, carrots, and a drizzle of sriracha mayo. This version brings a bright, umami punch that will keep guests coming back.
The Vegan Version
Use a plant‑based cod substitute and a vegan mayo in the sauce. Add a layer of roasted red pepper for sweetness and a sprinkle of nutritional yeast for a cheesy flavor. The result is a satisfying sandwich that satisfies both vegans and carnivores alike.
The Breakfast Brunch
Serve the sandwich on a toasted English muffin instead of a brioche bun. Add a fried egg on top and a drizzle of hollandaise for a brunch‑worthy treat. The combination of crispy fish and runny yolk is a match made in culinary heaven.
The Low‑Calorie Fix
Replace the traditional frying method with an air‑fryer, using a light spray of oil. Use a low‑fat mayo in the sauce and a whole‑grain bun to reduce calories without sacrificing flavor. This version keeps the crunch while cutting down on fat.
Storing and Bringing It Back to Life
Fridge Storage
Store the assembled sandwich in an airtight container for up to 48 hours. Keep the sauce separate until ready to serve to prevent the bun from becoming soggy. Reheat the fish in a skillet over low heat for 2 minutes to regain crispness.
Freezer Friendly
Wrap the fried cod tightly in foil and freeze for up to two weeks. To reheat, thaw overnight and then warm in a 350°F oven for 10 minutes. The batter will stay crisp if you toast the bun fresh before serving.
Best Reheating Method
The best way to revive a frozen sandwich is to place it in a preheated oven at 350°F for 10 minutes. Add a splash of water to the pan to create steam, which keeps the fish moist. Finish by toasting the bun to restore that buttery crunch.