I’ll be honest — I ate half the batch before anyone else got to try it, and that was after a disastrous midnight pizza craving that left my kitchen looking like a crime scene. The cheese had melted into a gooey river, the pepperoni was doing a sad solo on a soggy crust, and I was left with a plate that tasted like a wet sponge. I stared at the mess, muttering a dare to myself: “I bet I can turn this into something that crunches like fireworks and tastes like a pizza party in a bite.” The next morning, armed with only shredded cheese and pepperoni, I discovered a two‑ingredient miracle that turned that soggy nightmare into the crispiest, most addictive snack I’ve ever made.
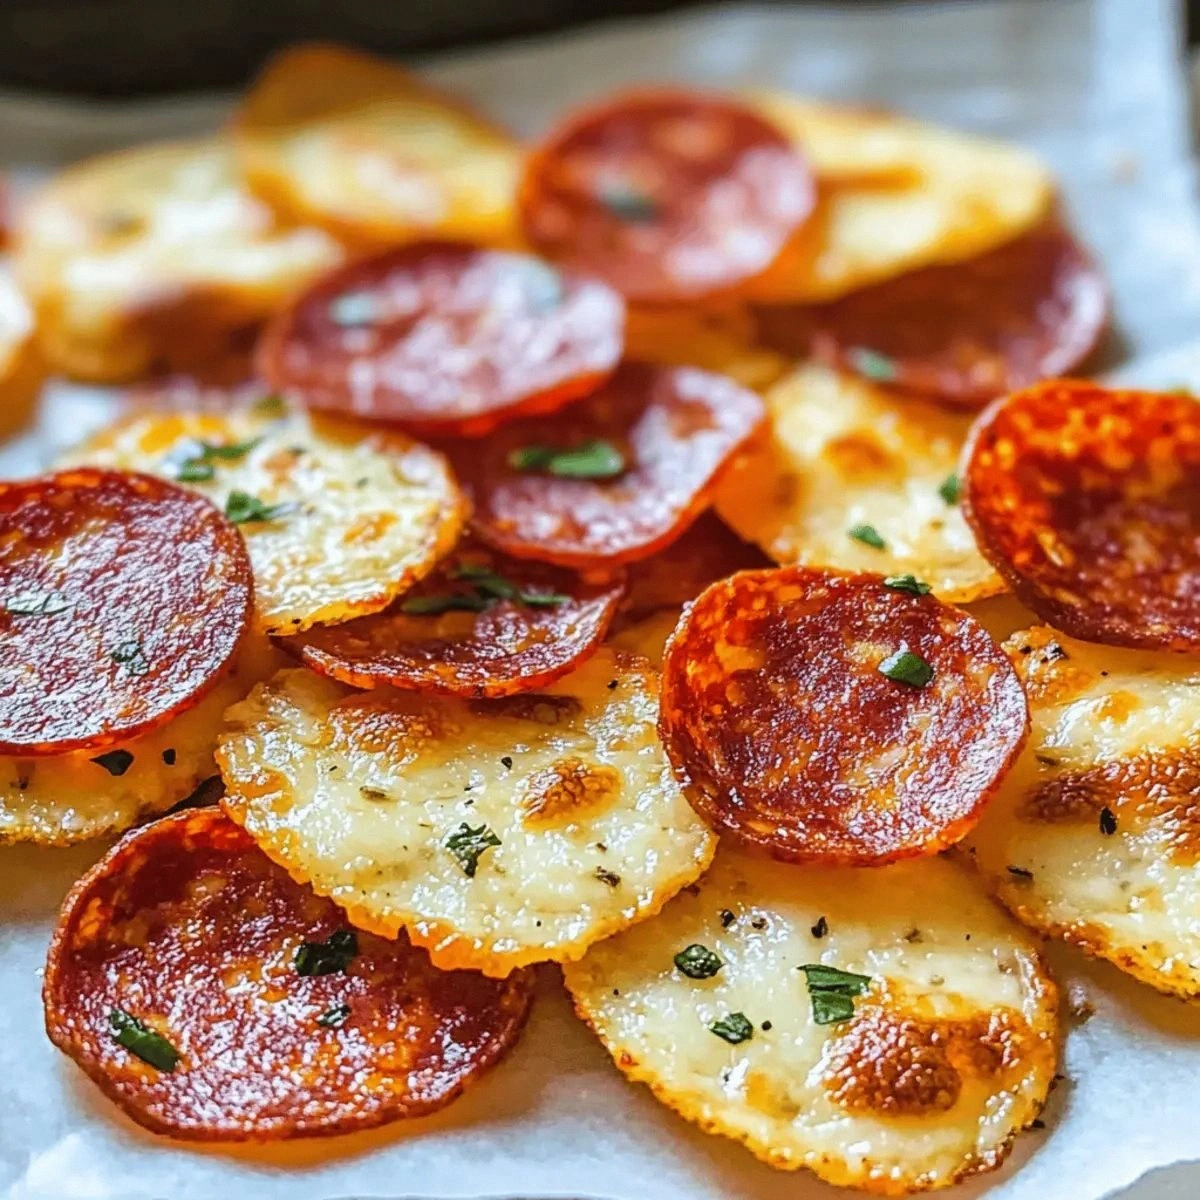
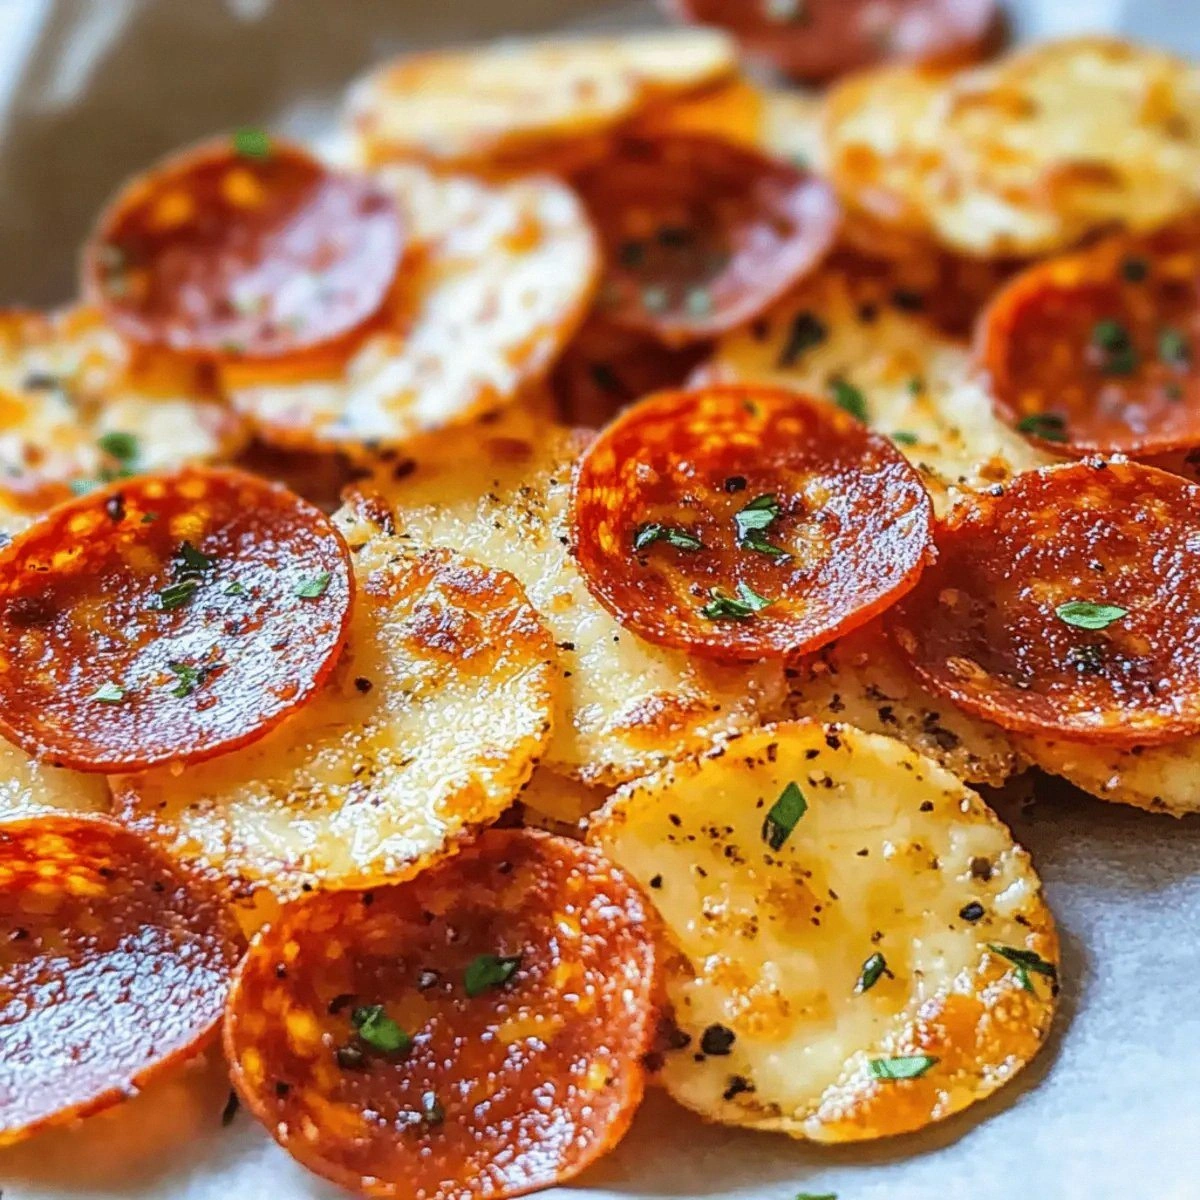
Picture yourself pulling a tray of golden‑brown chips out of the oven, the whole kitchen smelling like a New York pizzeria at midnight. The aroma of melted mozzarella mingles with the peppery snap of pepperoni, and the first bite shatters with a satisfying crunch that echoes through the room. It’s the kind of sound that makes you pause the TV, stare at the plate, and think, “I dare you to taste this and not go back for seconds.” The texture is a perfect contrast: a crisp edge that gives way to a chewy, cheesy heart that stretches like a warm blanket on a cold night.
Most recipes for pizza‑flavored snacks either drown you in dough or rely on a laundry list of obscure ingredients. Here’s the game‑changer: just two main components, a dash of spices, and a sprinkle of optional toppings, all baked to a crackling finish. This version stands out because it embraces the pure, unadulterated flavors of pizza without the heaviness of a crust, and it does so in a fraction of the time. The secret? A high‑heat blast that caramelizes the cheese edges while the pepperoni releases its oils, creating a self‑basting effect that no sauce can replicate.
Okay, ready for the game‑changer? Let me walk you through every single step — by the end, you’ll wonder how you ever made pizza snacks any other way. I’m going to share the exact temperatures, the sensory checkpoints, and a handful of hacks that will make your chips so perfect they’ll practically jump onto the plate on their own. Stay with me here — this is worth it.
What Makes This Version Stand Out
- Flavor Punch: The combination of shredded cheese and pepperoni delivers an instant pizza flavor that’s bold enough to satisfy even the most demanding palate.
- Texture Triumph: The high‑heat bake creates a crisp outer shell while keeping the interior tender, giving you that addictive crunch‑chew contrast.
- Simplicity: Only two core ingredients plus spices means you can whip this up in under an hour without rummaging through the pantry.
- Ingredient Quality: Using real shredded mozzarella and high‑quality pepperoni means every bite bursts with authentic, melt‑in‑your‑mouth goodness.
- Crowd Reaction: These chips disappear faster than you can say “extra cheese,” making them perfect for parties, game nights, or solo binge‑watch sessions.
- Make‑Ahead Potential: Store them in an airtight container and they stay crispy for days, so you can prep a batch ahead of time and never be caught snack‑less.
- Versatility: The base is a blank canvas for herbs, spices, or extra toppings, letting you customize the flavor profile on the fly.
- Low‑Carb Friendly: Skip the traditional dough and you get a snack that’s lower in carbs but still satisfies that pizza craving.
Inside the Ingredient List
The Flavor Base
Shredded cheese is the heart of this snack. I use a blend of mozzarella and a touch of provolone for that stretchiness and a subtle tang. If you skip the cheese, you lose the entire pizza essence, and the chips become just bland, crunchy dough. When selecting cheese, look for a block that you can grate yourself; pre‑shredded varieties often contain anti‑caking agents that interfere with crisping.
The Texture Crew
Pepperoni provides both flavor and fat, which acts as a natural lubricant during baking. The tiny pockets of oil burst, creating pockets of steam that puff the cheese slightly, resulting in that airy interior. If you use turkey pepperoni, expect a drier chip because of the lower fat content. For a spicier kick, choose a hot‑pepperoni variety or add a pinch of crushed red pepper flakes.
The Unexpected Star
Spices & Herbs are the secret whisper that elevates the flavor from “good” to “mind‑blowing.” A blend of dried oregano, garlic powder, and a pinch of smoked paprika adds depth without overwhelming the cheese. If you’re feeling adventurous, a dash of Italian seasoning or a sprinkle of fresh basil after baking can add a fresh pop.
The Final Flourish
Extra Toppings let you personalize each batch. Think sliced olives, jalapeños, or even a drizzle of honey for a sweet‑savory twist. The key is to keep toppings thin; too much moisture will sog the chips. If you’re a cheese purist, skip the extras and let the cheese and pepperoni shine.
Everything's prepped? Good. Let’s get into the real action…
The Method — Step by Step
Preheat your oven to a scorching 425°F (220°C). This high temperature is crucial; it forces the cheese to caramelize quickly, creating those coveted crispy edges. While the oven warms, line a large baking sheet with parchment paper to prevent sticking. The moment the oven hits the set temperature, you’ll hear a faint “whoosh” that signals it’s ready for action.
In a large mixing bowl, combine the shredded cheese with the pepperoni slices. Toss gently so each piece of pepperoni gets a generous coating of cheese. This coating is the secret self‑basting mechanism – as the cheese melts, it drips onto the pepperoni, releasing its oils and intensifying flavor.
Kitchen Hack: Use a silicone spatula to gently fold the mixture; over‑mixing can cause the cheese to clump and lose its airy texture.Sprinkle your chosen spices & herbs over the mixture. I recommend 1 teaspoon of dried oregano, ½ teaspoon of garlic powder, and a pinch of smoked paprika. Toss again until the seasoning is evenly distributed. This step is where the aroma starts to build; you’ll notice a faint herbal perfume even before the heat hits.
Using a tablespoon, scoop out small mounds of the cheese‑pepperoni blend onto the parchment sheet, spacing them about 1 inch apart. Press each mound lightly with the back of the spoon to flatten them into discs about ¼ inch thick. The uniform size ensures even cooking and prevents some chips from burning while others stay soggy.
Slide the sheet into the preheated oven and bake for 12‑15 minutes. Keep a close eye on them; you’re looking for a golden‑brown hue and edges that start to pull away from the parchment. That sizzle when it hits the pan? Absolute perfection. If you see any chips puffing too much, rotate the tray halfway through for even browning.
Watch Out: Over‑baking turns the cheese into a burnt, bitter crust. Pull them out as soon as the edges are crisp and the centers are just set.Once baked, remove the tray and let the chips cool on the parchment for 3‑5 minutes. This cooling period allows the residual heat to finish crisping the edges without making them too hard. You’ll notice the chips will firm up dramatically as they lose steam.
If you’re adding extra toppings like sliced olives or jalapeños, sprinkle them on now while the chips are still warm. The residual heat will lightly soften the toppings, integrating their flavor without making the chips soggy.
Transfer the cooled chips to an airtight container. For maximum crunch, place a single layer of parchment between layers if you need to stack them. Store at room temperature for up to 3 days, or freeze for longer storage.
That’s it — you did it. But hold on, I’ve got a few more tricks that'll take this to another level. These insider tips will ensure every batch is flawless, whether you’re feeding a crowd or just satisfying a midnight craving.
Insider Tricks for Flawless Results
The Temperature Rule Nobody Follows
Most home cooks set the oven to 400°F for cheese‑based snacks, but that temperature leaves the interior soft and the edges under‑crisped. Crank it up to 425°F and you’ll get a rapid caramelization that locks in flavor while giving you that snap‑crackle‑pop you crave. I once tried 375°F for a “gentle bake” and ended up with soggy, doughy circles that tasted like a failed cheese puff. Trust the heat; it’s the difference between snack and masterpiece.
Why Your Nose Knows Best
Your sense of smell is the ultimate doneness gauge. When the cheese starts to turn a deep golden and you catch a nutty, slightly caramel scent, you’re at the perfect moment. Don’t rely solely on the timer; ovens vary, and that aroma tells you when the chips have reached that magical “just‑right” stage. If you miss it, the chips can go from perfect to burnt in seconds.
The 5‑Minute Rest That Changes Everything
After baking, let the chips rest on the sheet for exactly five minutes. This brief pause lets steam escape, preventing the chips from becoming soggy as they cool. I once skipped this step and found the chips were soft in the middle, ruining the texture. A short rest is a tiny habit that yields massive texture rewards.
The “Flip‑Half‑Way” Technique
If you notice uneven browning, gently flip each chip halfway through the bake. Use a thin spatula to avoid breaking them. This ensures both sides get equal exposure to the heat, creating uniform crunch. A friend tried baking without flipping and ended up with one side burnt and the other pale — not a good look.
Seasoning After the Bake
A final sprinkle of flaky sea salt or a dash of fresh cracked pepper right after the chips come out adds a burst of flavor that sticks to the still‑warm surface. The salt adheres better when the cheese is slightly oily, enhancing each bite. It’s a small step that turns good chips into unforgettable ones.
Creative Twists and Variations
This recipe is a playground. Here are some of my favorite ways to switch things up:
Spicy Sriracha Swirl
After the chips have cooled, drizzle a thin line of sriracha and use a toothpick to swirl it through the cheese. The heat from the sauce melds with the cheese, giving each bite a punchy, lingering spice that’s perfect for those who love a little fire.
Herb‑Infused Green
Add a tablespoon of finely chopped fresh basil and a pinch of thyme to the cheese mixture before baking. The herbs release their fragrant oils during baking, turning the chips into a garden‑fresh snack that pairs beautifully with a glass of crisp white wine.
Cheesy Jalapeño Pop
Mix in diced jalapeños and a handful of shredded cheddar with the mozzarella. The extra cheddar adds a sharper flavor, while the jalapeños bring a bright, peppery heat that cuts through the richness.
Sweet‑Savory Honey‑Glaze
Once the chips are out of the oven, lightly brush them with honey and sprinkle a pinch of sea salt. The honey caramelizes slightly on the warm surface, creating a delightful sweet‑savory contrast that’s unexpectedly addictive.
Mediterranean Olive & Feta
Swap pepperoni for chopped Kalamata olives and crumble feta cheese into the mix. The salty, briny notes transport you straight to a seaside taverna, and the feta adds a creamy tang that complements the crisp cheese base.
Storing and Bringing It Back to Life
Fridge Storage
Place the cooled chips in an airtight container lined with a paper towel to absorb any excess moisture. They’ll stay crisp for up to three days. If you notice any soft spots, re‑bake them for 3‑4 minutes at 375°F to revive the crunch.
Freezer Friendly
Arrange the chips in a single layer on a baking sheet and freeze for 30 minutes, then transfer to a zip‑top bag. They’ll keep for up to a month. When you’re ready to snack, pop them straight into a preheated 350°F oven for 5‑7 minutes; the heat will bring them back to life without sogginess.
Best Reheating Method
To reheat without losing crunch, use a hot skillet over medium‑high heat for 1‑2 minutes per side, or the oven method mentioned above. Adding a tiny splash of water (about a teaspoon) to the pan before reheating creates a brief steam burst that revives the interior while the exterior stays crisp.