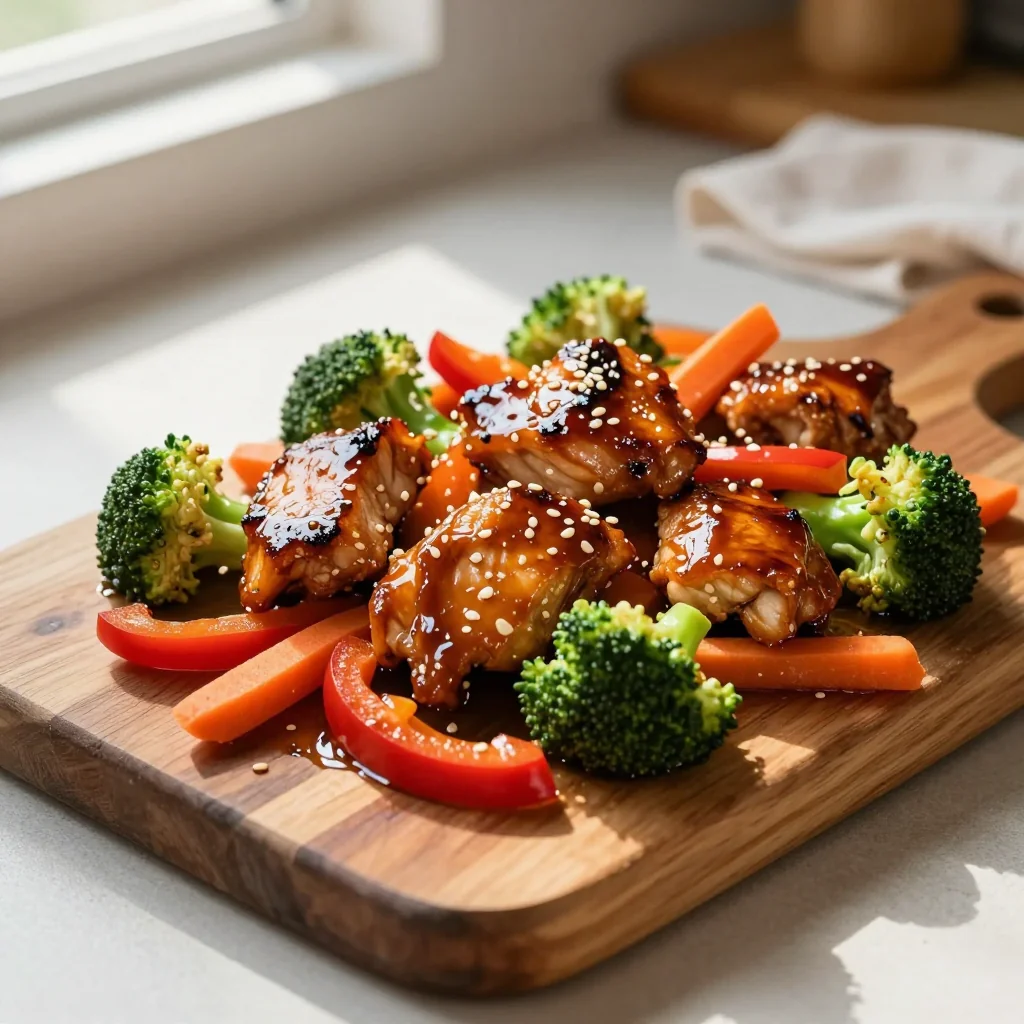
A quick, savory stir‑fry that brings the sweet‑salty glow of classic Japanese teriyaki to your weeknight table.
When I was a teenager, my family would gather around the kitchen table every Friday for a quick “take‑out night.” One evening, my older brother brought home a small bottle of teriyaki sauce from a local Asian market, and the aroma that drifted through the hallway was nothing short of intoxicating. I still remember the caramel‑sweet scent mingling with the sizzling sound of the wok as the chicken hit the hot oil—an instant memory that has stayed with me for years.
Teriyaki, originally a method of glazing fish or meat with a soy‑based reduction, has traveled across continents and become a beloved staple in home cooking worldwide. Its balance of salty soy, sweet honey, and a hint of acidity creates a flavor profile that feels both familiar and exotic, making it perfect for a fast stir‑fry that doesn’t sacrifice depth.
In this recipe, I’ll walk you through every step—from marinating the chicken to achieving that glossy, restaurant‑quality glaze—so you can recreate the magic of that teenage night in your own kitchen, any night of the week.
Grab your wok, fire up the burner, and let’s turn a simple pantry staple into a vibrant, crowd‑pleasing dish.
🌟 Why This Recipe Will Win Your Heart
Teriyaki Chicken Stir Fry isn’t just a meal; it’s a celebration of flavor, texture, and convenience—all wrapped in a single pan.
- ✨ Speedy Weeknight Hero: From prep to plate in under 30 minutes, this dish fits perfectly into busy schedules without compromising on taste.
- ✨ Balanced Nutrition: Lean chicken provides high‑quality protein while colorful vegetables deliver fiber, vitamins, and antioxidants.
- ✨ Versatile Palette: The base teriyaki glaze can be tweaked with extra heat, citrus, or herbs, allowing you to tailor the flavor to any craving.
- ✨ One‑Pan Simplicity: Minimal cleanup means you can spend more time enjoying the meal and less time scrubbing dishes.
- ✨ Budget‑Friendly: All ingredients are readily available at any grocery store, keeping costs low while delivering gourmet results.
- ✨ Crowd‑Pleaser: Sweet, salty, and slightly smoky, this stir‑fry satisfies both kids and adults, making it ideal for family dinners or casual gatherings.
🥗 The Ingredients
📝 Complete Ingredient List
For the Stir‑Fry:
For the Teriyaki Sauce:
For Garnish:

🔍 Focus on Key Ingredients
Chicken Thighs
Chicken thighs have a higher fat content than breasts, which keeps them moist during the high‑heat stir‑fry. Look for thighs with a uniform pink color and no visible bruising. Trim excess skin if desired, but keeping a thin layer adds flavor and helps the glaze cling.
Soy Sauce
Soy sauce is the backbone of the teriyaki glaze, delivering salty umami depth. Opt for a naturally brewed soy sauce for a richer flavor profile. Light soy sauce works if you prefer a less intense saltiness, but the classic dark soy adds a beautiful caramel color.
Honey
Honey balances the salt with a mellow sweetness and contributes to the glossy finish. If you have a honey allergy or prefer a vegan version, substitute with agave nectar or maple syrup—just keep the volume the same.
🔄 Quick Substitutions
| If you don’t have... | Use instead... |
|---|---|
| Chicken thighs | Chicken breast (add 1 tbsp oil) |
| Sake | Dry sherry or extra mirin |
| Sesame oil | Peanut oil (use half the amount) |
👨🍳 Step‑by‑Step Instructions
Follow these detailed steps to achieve a perfectly balanced teriyaki glaze and crisp‑tender vegetables.
📋 Phase 1: Preparation & Mise en Place
Gather, slice, and marinate before the wok heats up.
Slice the Chicken
Trim any excess fat from the thighs, then cut them into bite‑size strips about ½ inch wide. Pat the pieces dry with paper towels; moisture on the surface will steam rather than sear, preventing the desired caramelization.
Prepare the Vegetables
Wash the broccoli, then cut into small florets. Slice the red bell pepper into thin strips, and julienne the carrot. Mince the garlic and grate the ginger; set each aside in separate bowls to avoid cross‑contamination of flavors.
Mix the Teriyaki Sauce
In a medium bowl, whisk together soy sauce, mirin, sake (if using), honey, rice vinegar, and sesame oil. In a small cup, dissolve the cornstarch slurry (1 tsp cornstarch + 2 tbsp water) and set aside; this will thicken the sauce at the end of cooking.
🔥 Phase 2: Cooking & Assembly
High heat is essential for that signature wok‑kissed flavor.
Heat the Wok
Place a large wok or deep skillet over medium‑high heat. Add 1 tablespoon of vegetable oil and swirl to coat. When the oil shimmers (about 30 seconds), it’s ready for the chicken.
Sear the Chicken
Arrange the chicken strips in a single layer. Let them sit untouched for 1–2 minutes to develop a golden crust, then stir‑fry for another 3–4 minutes until cooked through. Transfer the chicken to a plate and keep warm.
Sauté Aromatics & Vegetables
Add the remaining tablespoon of oil to the wok. Toss in garlic and ginger; stir for 15 seconds until fragrant. Immediately add the bell pepper, broccoli, and carrot. Stir‑fry for 3–4 minutes, keeping the vegetables crisp‑tender.
Combine Chicken & Sauce
Return the cooked chicken to the wok. Pour the prepared teriyaki sauce over the mixture, stirring to coat evenly. Bring to a gentle simmer, then drizzle the cornstarch slurry while stirring continuously. The sauce should thicken within 1–2 minutes, becoming glossy and clinging to each piece.
Finish with Garnish
Remove the wok from heat. Sprinkle toasted sesame seeds, sliced green onions, and optional chili flakes over the top. Give a final gentle toss to distribute the garnish evenly.
✨ Phase 3: Plating & Serving
A beautiful presentation turns a great dish into an unforgettable one.
Check Doneness
Slice a piece of chicken; the interior should be opaque with no pink. The vegetables should retain a bright color and a slight crunch. If the sauce has thickened too much, add a splash of water and stir.
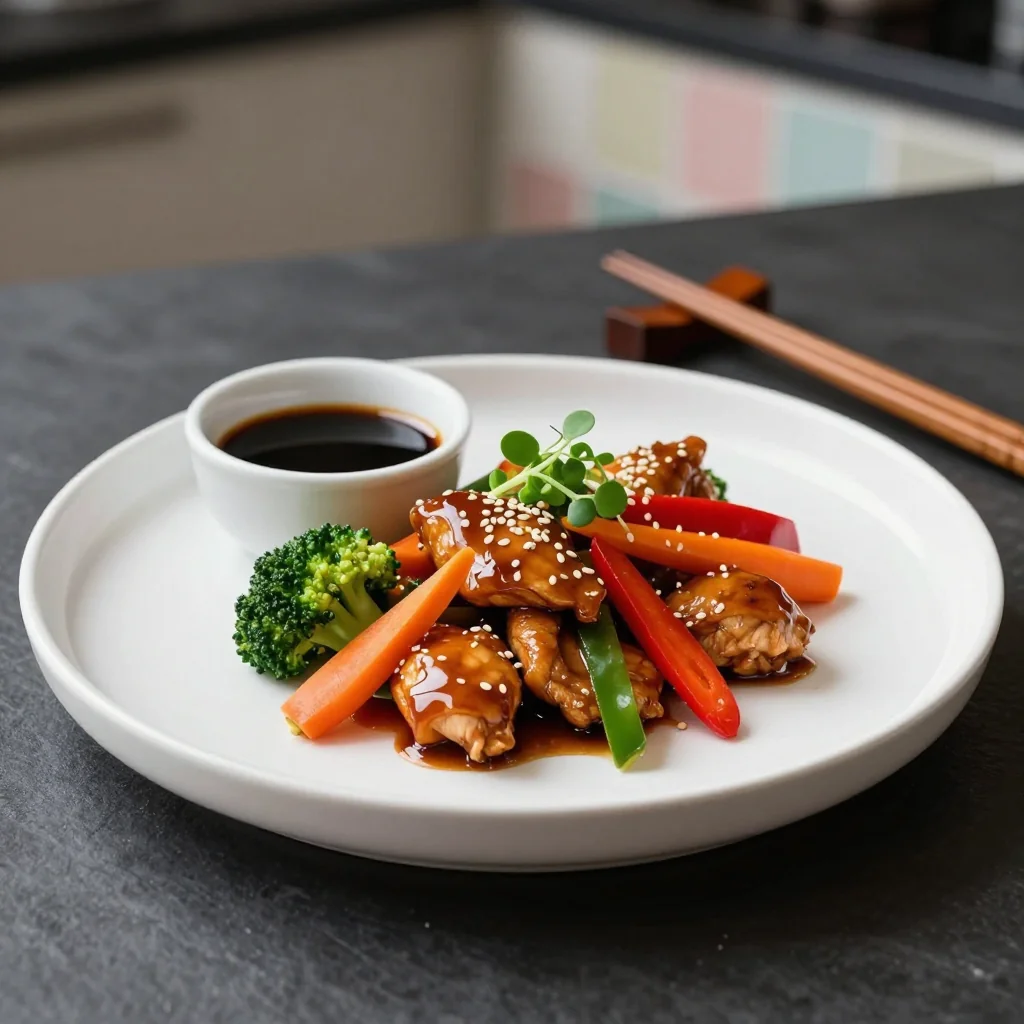
Serve
Plate the stir‑fry over steamed jasmine rice or cauliflower rice for a low‑carb option. Drizzle any remaining sauce from the wok over the top, and serve immediately while steaming hot.
💡 Expert Tips & Tricks
🛒 Choosing the Right Ingredients
When buying chicken, look for thighs with a uniform pink color and a slight sheen; avoid any with gray spots. Fresh vegetables should be firm—broccoli crowns should snap when bent, and bell peppers should feel heavy for their size. For soy sauce, a naturally brewed version provides depth without excessive sodium.
🔪 Preparation Techniques
Dry the chicken thoroughly before coating with cornstarch; moisture creates steam that prevents browning. Use a sharp chef’s knife to slice the vegetables uniformly—this ensures even cooking. Group ingredients by cooking time: aromatics first, then harder vegetables, followed by softer ones.
🌡️ Mastering the Heat
Preheat the wok until a drop of water sizzles and evaporates instantly. This “smoking” point is crucial for a good sear. Keep the heat on medium‑high throughout; if the sauce begins to burn, lower the flame briefly and add a splash of water.
🍽️ Presentation & Service
Serve the stir‑fry over a bed of rice to soak up the glaze. Garnish with a sprinkle of sesame seeds and a few extra green onion rings for color contrast. For an elegant touch, drizzle a few drops of toasted sesame oil around the plate.
🏆 Pro Chef Secrets
Elevate this home‑cooked classic to restaurant quality with these insider tricks.
- 🎯 High‑Smoke‑Point Oil: Use grapeseed or refined peanut oil instead of vegetable oil; they tolerate higher temperatures without breaking down, giving a cleaner, brighter sear.
- 🎯 Double‑Layered Sauce: After the first thickening, deglaze the wok with a splash of sake and let it reduce. This adds an extra layer of complexity and a subtle sweetness.
- 🎯 Ultra‑Fine Cornstarch Slurry: Whisk the cornstarch with cold water until completely smooth; any lumps will create grainy texture in the glaze.
- 🎯 Rest Before Serving: Let the finished dish rest for 2 minutes off the heat; this allows the sauce to settle and the flavors to meld.
- 🎯 Flavor Boost with Kombu: Simmer a small piece of kombu (dried kelp) in the sauce for 5 minutes before adding the chicken for a deep umami boost.
- 🎯 Finish with a Squeeze of Yuzu: A few drops of yuzu juice added just before plating brighten the glaze and balance the sweetness.
"The secret to great teriyaki is patience—let the sauce caramelize just enough to develop that glossy, almost lacquered finish." — Chef Masaharu Morimoto
🔄 Variations & Adaptations
Teriyaki is a versatile canvas; feel free to experiment with proteins, heat levels, and cultural twists.
🥬 Vegetarian / Vegan Version
Swap the chicken for firm tofu (pressed and cubed) or tempeh. Marinate the tofu in the same teriyaki sauce for 15 minutes, then follow the same cooking steps. For a fully vegan dish, replace honey with maple syrup and ensure the soy sauce is gluten‑free if needed.
- Use 400 g extra‑firm tofu, pressed and cubed.
- Replace honey with 2 tbsp maple syrup.
🌶️ Flavor Variations
Adjust the base glaze to suit different culinary moods.
Spicy Version:
Incorporate 1 tsp Sriracha or Korean gochujang into the sauce and increase chili flakes to ½ tsp for a gentle heat.
Mediterranean Version:
Swap soy sauce for a blend of olive oil, lemon zest, and a splash of balsamic vinegar. Add olives and sun‑dried tomatoes for a Mediterranean flair.
Classic Asian Version:
Include a handful of sliced shiitake mushrooms and a drizzle of toasted sesame oil at the end for deeper umami.
⚠️ Dietary Adaptations
Gluten‑Free:
Use tamari (gluten‑free soy sauce) and ensure the cornstarch is certified gluten‑free.
Lactose‑Free:
This recipe is already lactose‑free; just avoid serving with dairy‑based sides.
Low‑Calorie:
Reduce oil to 1 tbsp, increase broccoli proportion, and serve over cauliflower rice. Use a sugar‑free sweetener like stevia in place of honey.
👶 Kid‑Friendly Version
Omit chili flakes and use a milder soy sauce. Cut vegetables into fun shapes with cookie cutters, and serve with a side of sweet corn or edamame for added texture that children love.
📦 Storage & Reheating
🧊 Conservation
Refrigerator:
- Duration: 3 days
- Container: Airtight glass or BPA‑free plastic container
- Tip: Store sauce separately if you plan to reheat later to maintain crispness.
Freezer:
- Duration: 2 months
- Method: Cool completely, then portion into freezer‑safe bags, removing excess air.
- Defrost: Overnight in refrigerator or quick‑defrost in microwave (30 sec).
💡 For best texture, re‑stir the sauce after thawing; a splash of water will revive its gloss.
♨️ Reheating
🔥 Oven (Recommended):
- Preheat to 180 °C (350 °F).
- Cover dish with foil to retain moisture.
- Heat for 12‑15 minutes, stirring halfway.
- Remove foil, toss, and heat an additional 3‑4 minutes for a slight caramelization.
⚡ Microwave (Quick):
- Place portion in a microwave‑safe bowl, cover loosely.
- Heat on medium power for 1 minute.
- Stir, then heat another 30 seconds if needed.
🍳 Stovetop:
Heat a non‑stick skillet over medium heat, add a splash of water or broth, and stir‑fry for 3‑4 minutes until steaming hot.
🍷 Perfect Pairings
🥗 Side Dishes
- Steamed Jasmine Rice: Its subtle fragrance absorbs the teriyaki glaze, creating a harmonious balance.
- Asian Slaw: A crisp mix of cabbage, carrots, and rice vinegar adds freshness and cuts the sweetness.
- Miso Soup: Warm, umami‑rich broth complements the savory‑sweet profile of the main dish.
🍷 Wine & Beverage Pairings
- Riesling (off‑dry): Its bright acidity and hint of sweetness echo the teriyaki glaze without competing.
- Sake (Junmai): A clean, dry sake enhances the Japanese roots of the dish.
- Non‑Alcoholic: Sparkling yuzu soda adds citrus sparkle that lifts the palate.
🍰 Completing the Meal
Start with a light miso‑marinated cucumber appetizer, follow with the teriyaki stir‑fry, and finish with a delicate matcha green‑tea ice cream. The subtle bitterness of matcha balances the sweet glaze, leaving a clean finish.
❓ Frequently Asked Questions
Q: Can I use chicken breast instead of thighs?
A: Yes, but chicken breast is leaner and can dry out quickly. To compensate, add an extra tablespoon of oil and marinate the breast for at least 30 minutes. Keep the cooking time short—about 3‑4 minutes per side—to retain juiciness.
Q: How do I make the sauce thicker without cornstarch?
A: Reduce the sauce over medium heat for 5‑7 minutes until it naturally thickens, or use a slurry of arrowroot powder mixed with cold water (1 tsp arrowroot + 2 tsp water). Arrowroot gives a glossy finish and is gluten‑free.
Q: What if I don’t have mirin?
A: Substitute with a mixture of 1 tbsp rice vinegar and 1 tbsp sugar, or use a dry sherry for a similar depth. The goal is to retain a mild sweetness and acidity.
Q: My sauce turned out watery—what went wrong?
A: Most likely the cornstarch slurry wasn’t added or the sauce didn’t reach a gentle boil. Ensure the slurry is mixed well and added while the sauce simmers; stir continuously for 1‑2 minutes until it thickens.
Q: Can I prepare the sauce ahead of time?
A: Absolutely. Store the uncooked sauce in an airtight container in the refrigerator for up to 3 days. Bring to room temperature and whisk before adding to the wok.
Q: How do I adjust the recipe for a larger crowd?
A: Multiply each ingredient proportionally. The portion adjuster on the recipe card (default 4 servings) will automatically recalculate quantities for you. Keep the wok size in mind; you may need to cook in batches to avoid overcrowding.
🎉 Let’s Get Cooking!
This Teriyaki Chicken Stir Fry brings together sweet, salty, and umami notes in a quick, satisfying dish that’s perfect for any night of the year. By mastering the balance of sauce, heat, and timing, you’ll create a glossy, restaurant‑quality glaze that clings lovingly to each piece of chicken and vegetable. Remember the pro tips—high‑smoke oil, a double‑layered sauce, and a brief rest before serving—to elevate your home‑cooked version to a new level of deliciousness.
Give it a try, share your photos, and let us know how you customized the recipe. Your feedback helps us refine the guide and inspires fellow cooks. Happy stir‑frying!
Did you try this recipe?
Leave a comment and rating below! Share your photos on Instagram with #TeriyakiStirFry for a chance to be featured.
Teriyaki Chicken Stir Fry
A quick, glossy stir‑fry that blends sweet honey with savory soy for a perfect weeknight dinner.
📝 Ingredients
Stir‑Fry
Teriyaki Sauce
Garnish
👨🍳 Instructions
- 1 Slice chicken thighs into bite‑size strips, pat dry, and coat lightly with cornstarch.
- 2 Prepare all vegetables: slice bell pepper, cut broccoli, julienne carrot, mince garlic, and grate ginger.
- 3 Whisk together soy sauce, mirin, sake, honey, rice vinegar, sesame oil, and set aside.
- 4 Heat wok over medium‑high, add 1 tbsp oil, and sear chicken until golden, about 4 minutes. Remove and set aside.
- 5 Add remaining oil, sauté garlic and ginger for 15 seconds, then add vegetables. Stir‑fry 3‑4 minutes.
- 6 Return chicken to wok, pour sauce over, bring to a gentle simmer, and stir in cornstarch slurry to thicken.
- 7 Sprinkle sesame seeds, green onions, and optional chili flakes. Toss gently.
- 8 Serve over steamed jasmine rice, garnish with extra seeds if desired.
- 9 Enjoy immediately while hot and glossy.
- 10 Store leftovers in an airtight container; reheat using one of the methods above.
🥗 Nutrition Facts (per serving)
*Values are estimates based on standard ingredient data.


💬 Comments & Reviews
Leave a Comment
No comments yet. Be the first to share your thoughts!