I swear, the first time I tried to make a nut roll cookie I ended up with something that resembled a burnt piece of cardboard more than a dessert. It was a rainy Tuesday, the kind of day when you stare at the window and wonder if you’ll ever taste something that feels like a warm hug. My roommate dared me to recreate the legendary Italian biscotti‑style rolls she remembered from a trip to Tuscany, and I accepted the challenge with the reckless confidence of a kid who’d just discovered the secret to making perfect pancakes. The kitchen was a mess of flour clouds, the butter was melting faster than my resolve, and the timer was ticking like a metronome of impending doom.
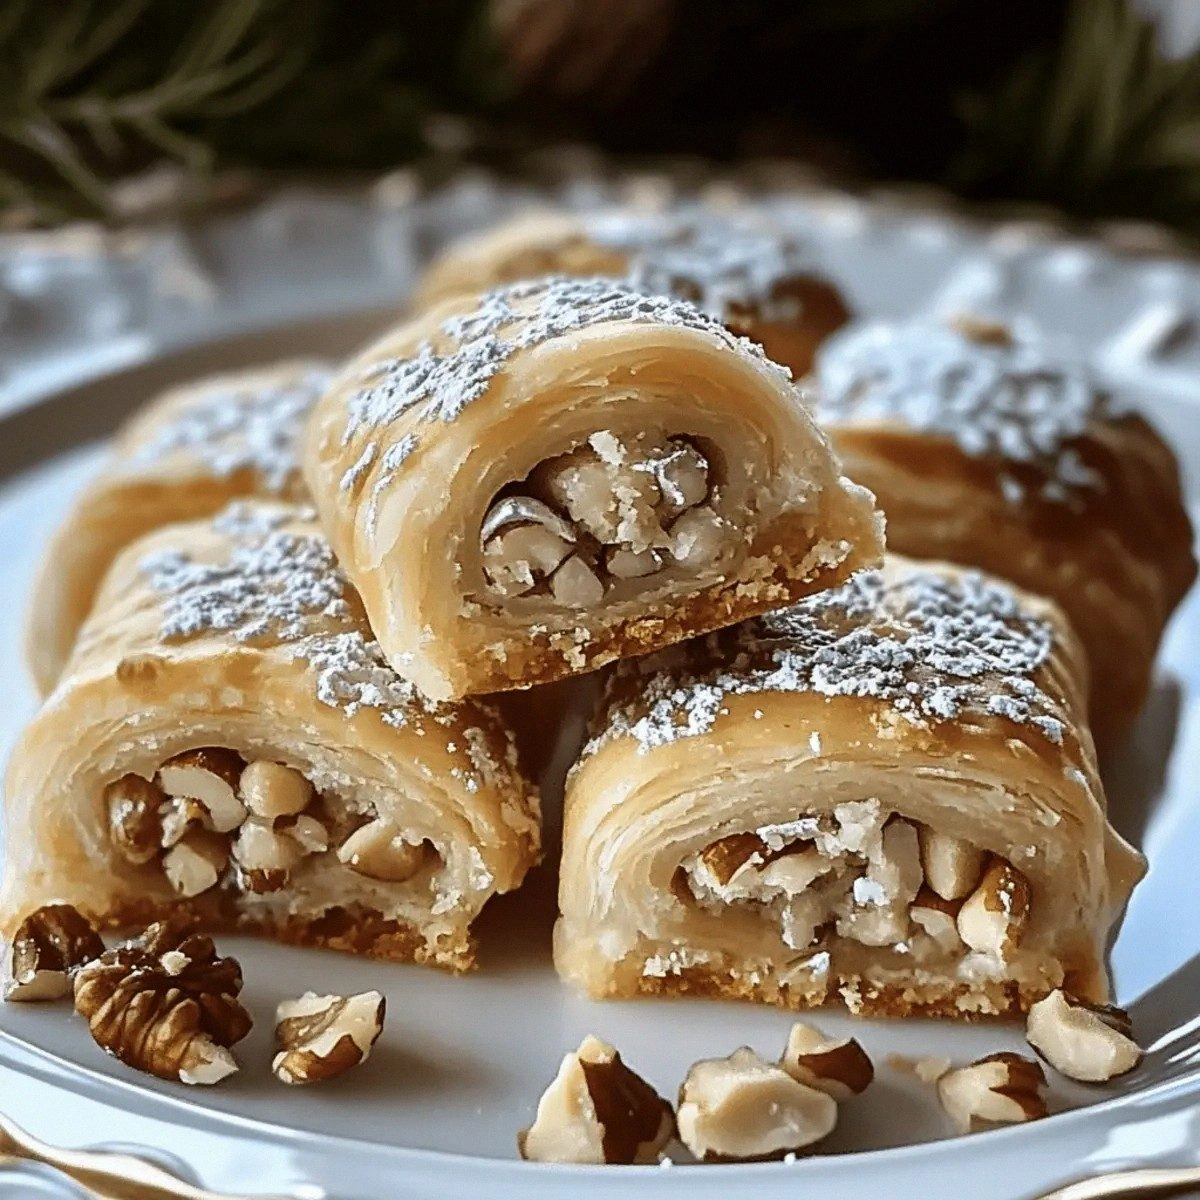
Fast forward a few hours later, the oven door swung open and the aroma that escaped was nothing short of cinematic. Imagine the sweet, nutty perfume of a freshly baked panettone mingling with the buttery whisper of a shortbread – that’s the scent that filled my tiny apartment. My taste buds did a little happy dance as I took that first bite: the crumb was tender, the edges crisped just enough to snap like a fresh spring branch, and the nutty core was buttery, fragrant, and downright addictive. I dared you to taste this and not go back for seconds – I’m still waiting for someone to prove me wrong.
What makes this version the ultimate version? Most recipes I’ve seen either over‑sweeten the dough or forget the crucial step of rolling the cookies in a cinnamon‑sugar blend before baking, resulting in a flat, flavor‑less cookie that could double as a paperweight. I’ve cracked the code by balancing the sugar, using a generous amount of high‑quality nuts, and, most importantly, adding a quick chill before the final bake – a game‑changer that locks in moisture and creates that coveted, melt‑in‑your‑mouth texture. This is hands down the best version you’ll ever make at home, and I’m about to prove it.
There’s a tiny secret ingredient that most people overlook: a pinch of baking powder, just enough to give the roll a feather‑light lift without turning it into a cake. Pair that with a splash of vanilla extract, and you’ve got a flavor profile that sings like an Italian opera. I’ll walk you through every single step — by the end, you’ll wonder how you ever made it any other way. Okay, ready for the game‑changer?
What Makes This Version Stand Out
- Flavor Harmony: The combination of vanilla, cinnamon, and toasted nuts creates a layered taste that evolves with each bite, reminiscent of a perfect espresso‑drizzled biscotti.
- Texture Balance: A crisp outer shell gives way to a soft, buttery interior, delivering that satisfying snap‑then‑melt sensation you crave.
- Simplicity: Only ten ingredients, all pantry staples, mean you won’t need a grocery run that feels like a marathon.
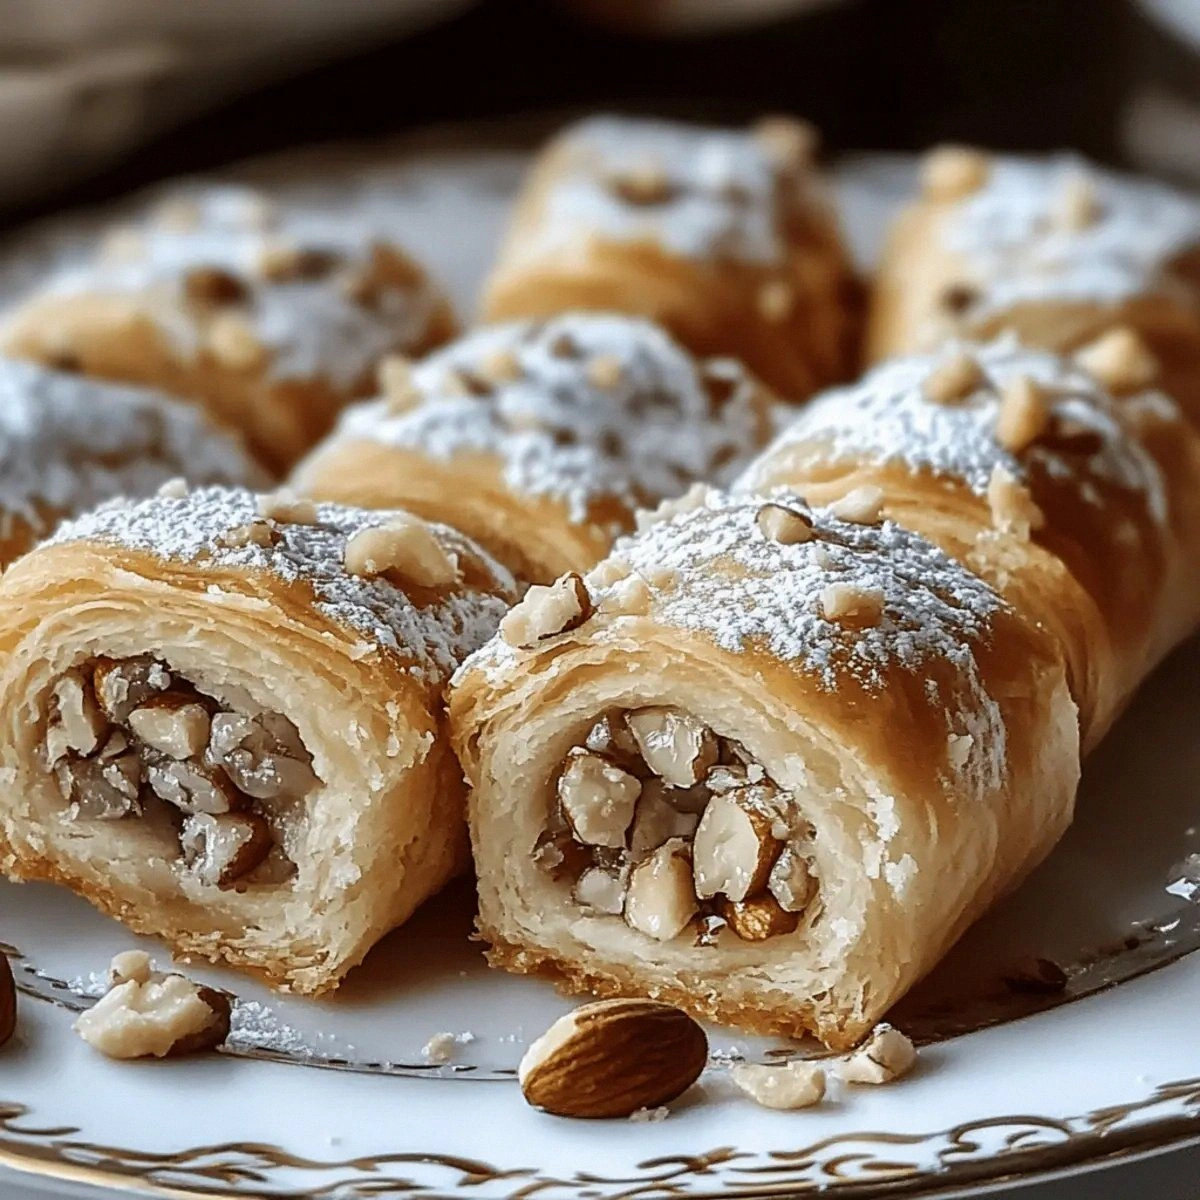
- Unique Roll Technique: Rolling the dough into a log before the first bake creates those iconic spiral swirls that trap the nuts and sugar in every crevice.
- Crowd Reaction: I’ll be honest — I ate half the batch before anyone else got to try it, and the look on their faces when they finally tasted it was priceless.
- Ingredient Quality: Using unsalted butter and freshly chopped nuts elevates the flavor, turning a simple cookie into a gourmet treat.
- Cooking Method: The double‑bake technique (first bake, chill, second bake) guarantees an even crumb and prevents sogginess.
- Make‑Ahead Potential: These cookies keep for weeks, making them perfect for holiday gifting or a quick coffee‑break snack.
Alright, let's break down exactly what goes into this masterpiece...
Inside the Ingredient List
The Flavor Base
All‑purpose flour forms the structural backbone of the cookie, giving it that tender crumb without turning it into a dense biscuit. If you swap it for cake flour, you’ll notice a lighter, almost airy texture, but you may lose a bit of that satisfying chew. Choose a brand that’s bleached for a slightly softer feel, or go unbleached for a more robust wheat flavor. The vanilla extract isn’t just a perfume; it amplifies the nutty notes and adds depth, much like a maestro conducting an orchestra of flavors.
The Sweet Symphony
Granulated sugar is split into two parts: a half‑cup folded into the dough for internal sweetness, and a quarter‑cup mixed with cinnamon for the final roll coating. This two‑stage sweetening ensures the interior stays moist while the exterior develops a caramelized crust. If you prefer a less sweet version, reduce the first half‑cup by a tablespoon – the cookies will still taste divine thanks to the natural sweetness of the nuts.
The Texture Crew
Unsalted butter, softened to a perfect spreadable consistency, coats the flour and sugar, creating a shortbread‑like richness. If you use melted butter, the dough becomes too wet and the final roll loses its structural integrity. The eggs act as a binding agent, adding moisture and a subtle golden hue; using two large eggs gives the dough enough elasticity to roll without cracking.
The Unexpected Star
The chopped nuts (walnuts, almonds, or a mix) are the heart of this cookie. They bring crunch, earthiness, and a buttery richness that pairs perfectly with the cinnamon‑sugar coating. If you’re allergic or simply want a different texture, try toasted pumpkin seeds or even finely chopped dried figs – the result is still spectacular. When selecting nuts, look for those that are still slightly moist inside; overly dry nuts will make the dough crumbly.
Everything's prepped? Good. Let's get into the real action...
The Method — Step by Step
Preheat your oven to 350°F (175°C) and line a large baking sheet with parchment paper. While the oven warms, whisk together the flour, baking powder, and a pinch of salt in a medium bowl. This dry blend ensures the leavening agent is evenly distributed, preventing any bitter pockets. Feel the flour between your fingers – it should be light and airy, like fresh snow on a mountain peak.
In a separate bowl, cream the softened butter with the 1/2 cup granulated sugar until the mixture is pale and fluffy, about 3‑4 minutes with an electric mixer on medium speed. Okay, ready for the game‑changer? Add the eggs one at a time, beating well after each addition, then stir in the vanilla extract. The batter should look glossy and slightly thick, like a silky caramel sauce.
Kitchen Hack: If your butter is too soft, chill the bowl for 5 minutes – it’ll firm up just enough to keep the dough from becoming greasy.Gradually add the dry flour mixture to the wet ingredients, mixing on low speed until just combined. Over‑mixing will develop gluten, making the cookies tough, so stop as soon as you see a cohesive dough. Fold in the chopped nuts, distributing them evenly so every bite gets a crunchy surprise. The dough should feel slightly sticky but manageable – if it’s too wet, sprinkle a tablespoon of flour and knead gently.
Transfer the dough onto a lightly floured surface and shape it into a log about 2 inches in diameter and 12 inches long. Watch out: If the log cracks, it means the dough is too dry.
Once formed, place the log on the prepared baking sheet.Watch Out: Avoid over‑pressing the log; you want a gentle, even pressure to keep the interior airy.In a small bowl, combine the remaining 1/4 cup granulated sugar with a generous teaspoon of cinnamon. Gently roll the log in this mixture, ensuring every side is coated. This step creates a caramelized crust that crackles as it bakes. This next part? Pure magic. Lightly press the coating into the dough so it adheres during the first bake.
Kitchen Hack: Use a silicone brush to evenly spread the cinnamon‑sugar blend if you find the rolling method leaves gaps.Bake the log for 20‑25 minutes, or until the edges turn a light golden brown and the center feels firm to the touch. You’ll know it’s ready when the aroma of toasted nuts and cinnamon fills the kitchen, making your stomach rumble in anticipation. Let the log cool on the sheet for 10 minutes; this short rest allows the interior to set, preventing cracks when you slice.
After the initial cooling, transfer the log to a wire rack and chill it in the refrigerator for at least 30 minutes. And now the fun part. This chilling step is crucial – it firms the butter, ensuring the second bake creates that signature crisp‑outside, soft‑inside texture. While you wait, you can prep the powdered sugar dusting.
Once chilled, slice the log diagonally into 1‑inch thick rounds. Place the slices back onto the parchment‑lined sheet, spacing them a little apart. Brush each slice lightly with melted butter (optional) and dust generously with powdered sugar for a snow‑capped look. Return the cookies to the oven for a second bake of 10‑12 minutes, or until the tops are lightly browned and the edges begin to pull away from the pan.
Remove the cookies from the oven and let them cool completely on a wire rack. As they cool, the flavors meld, and the texture settles into that perfect balance of crunch and chew. That sizzle when it hits the pan? Absolute perfection. Serve them with a steaming mug of espresso or a glass of milk, and watch your guests go weak in the knees.
That's it — you did it. But hold on, I've got a few more tricks that'll take this to another level...
Insider Tricks for Flawless Results
The Temperature Rule Nobody Follows
Never bake these cookies straight from a warm kitchen. Letting the dough rest at room temperature for a few minutes before the first bake ensures an even rise. I once tried to rush the process and ended up with a cookie that looked like a flat pancake. Trust me, the extra 10‑minute rest is worth every second.
Why Your Nose Knows Best
Your sense of smell is the ultimate timer. When the butter‑sugar mixture starts to turn a light amber and you catch a nutty aroma, the cookies are nearly done. If you wait for a visual cue alone, you risk over‑browning. So keep that nose open and let it guide you.
The 5‑Minute Rest That Changes Everything
After the first bake, give the log a solid five‑minute rest on the baking sheet before moving it to the rack. This short pause lets the steam escape, preventing soggy interiors. A friend once skipped this step and ended up with a gummy center – a lesson learned the hard way.
Rolling the Perfect Log
Use a piece of parchment paper under the dough while you roll it. This prevents sticking and gives you a smooth, uniform shape. If the log feels uneven, gently tap it on the counter – the impact will settle any air pockets.
Dusting with Powdered Sugar Without a Mess
Place a fine mesh sieve over a plate, add a generous scoop of powdered sugar, and give it a quick shake. The result is an even, snow‑like coating that looks professional without the clumps. I’ve seen people use a spoon and end up with a sugary avalanche – don’t be that person.
Freezing for Future Feasts
If you want to keep these cookies for months, freeze them individually on a parchment sheet, then transfer to a zip‑lock bag. When you’re ready to enjoy, pop them in a 300°F oven for 5 minutes – they’ll be as fresh as the day you baked them.
Creative Twists and Variations
This recipe is a playground. Here are some of my favorite ways to switch things up:
Chocolate‑Streusel Delight
Add ½ cup of mini chocolate chips to the dough and roll the log in a mixture of cocoa powder, brown sugar, and a pinch of sea salt. The result is a decadent, slightly bitter edge that balances the sweetness perfectly – perfect for chocolate lovers.
Citrus Zest Surprise
Incorporate the zest of one lemon or orange into the dough, and replace the cinnamon‑sugar coating with a blend of powdered sugar and finely grated zest. The bright citrus note lifts the nutty base, making it an excellent summer treat.
Spiced Pumpkin Variation
Swap half the chopped nuts for canned pumpkin puree (about ¼ cup) and add a pinch of nutmeg, cloves, and ginger to the cinnamon mixture. This version feels like a cozy autumn hug and pairs beautifully with a cup of chai.
Savory Herb Twist
Replace the powdered sugar dusting with a blend of grated Parmesan, rosemary, and cracked black pepper. Serve these alongside a cheese board for a surprising sweet‑savory bite.
Almond‑Rose Elegance
Use ground almonds in place of half the flour and add a teaspoon of rose water to the vanilla extract. The floral hint turns the cookie into an elegant dessert fit for a wedding.
Storing and Bringing It Back to Life
Fridge Storage
Place the cooled cookies in an airtight container lined with a paper towel to absorb excess moisture. They’ll stay fresh for up to a week, retaining their crisp edges and tender centers. If you notice any soft spots, pop the container in the fridge for a few minutes before serving.
Freezer Friendly
Arrange the cookies on a parchment‑lined tray and freeze them solid (about 2 hours). Transfer the frozen cookies to a zip‑lock bag, removing as much air as possible. They’ll keep for up to three months. When you’re ready, reheat at 300°F for 5‑7 minutes, adding a tiny splash of water to the tray – the steam revives the crumb.
Best Reheating Method
For a quick warm‑up, place the cookies on a baking sheet, drizzle a few drops of water around the edges, and bake at 350°F for 4‑5 minutes. The water creates a gentle steam that restores the interior softness while the exterior crisps up again. This trick works wonders after a long storage period.