The other night I was standing in front of an empty cookie jar, feeling the familiar pang of disappointment that comes when the last batch of chocolate chip cookies has vanished. I stared at the jar, then at the handful of Oreo crumbs I’d dropped on the counter, and a wild idea sparked: what if I could combine the nostalgic crunch of Oreos with the classic joy of chocolate chips and a splash of confetti? I laughed, grabbed a handful of rainbow sprinkles, and decided that this would be the most unforgettable cookie I’d ever bake.
I opened the pantry, pulled out the flour, the sugar, the chocolate chips, and the Oreos, and the kitchen filled with an aroma that was half buttery, half sweet, and entirely irresistible. The sound of the mixer humming, the sight of the dough slowly rising, the feel of the dough in my hands—each element was a promise that something extraordinary was about to happen. I could almost taste the first bite, the way the cookie would crackle slightly on the edges while the center remained soft and gooey.
I’ve tried countless cookie recipes, from the plain vanilla to the extravagant double chocolate, but none of them ever felt as complete as this one. The blend of Oreo crumbs gives a subtle, buttery depth that no other cookie can match, while the chocolate chips keep the classic chocolate chip charm alive. It’s a cookie that’s both a comfort food and a party trick rolled into one.
What sets this version apart is the unexpected addition of rainbow sprinkles, which add a pop of color and a hint of crunch that turns every bite into a mini celebration. I dare you to taste this and not go back for seconds. I’ll be honest—half of the batch vanished before anyone else could even take a bite. If you’ve ever struggled with cookie texture or flavor balance, you’re not alone—and I’ve got the fix.
Picture yourself pulling this out of the oven, the whole kitchen smelling incredible, the oven door swinging open to reveal a tray of golden‑brown cookies that are speckled like confetti. The moment the first cookie lands on the cooling rack, you know that this is hands down the best version you’ll ever make at home. Let me walk you through every single step—by the end, you’ll wonder how you ever made it any other way.
What Makes This Version Stand Out
- Flavor: The Oreo crumbs add a buttery, cookie‑butter depth that elevates the classic chocolate chip profile. The chocolate chips still provide that familiar melt‑in‑your‑mouth sweetness, creating a harmonious balance that satisfies any sweet tooth.
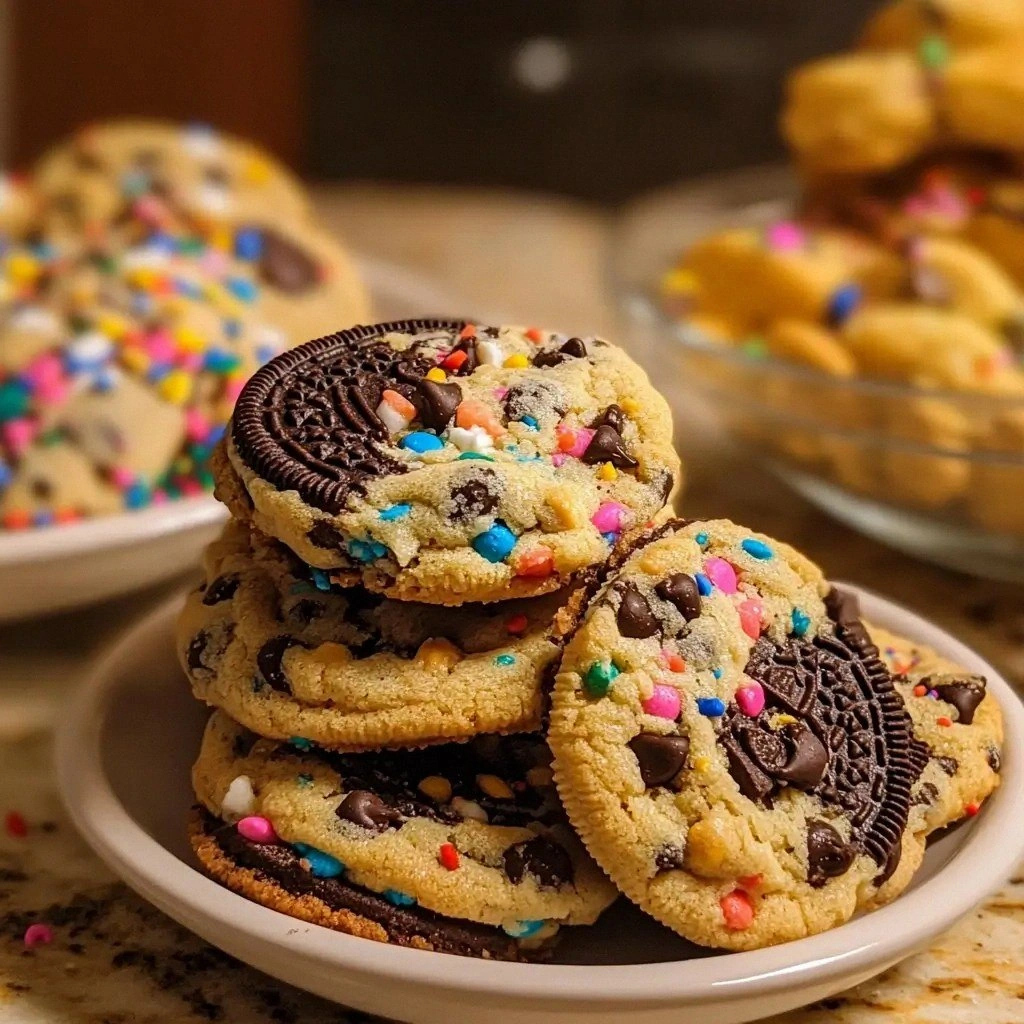
- Texture: The cookies boast a golden‑brown exterior that cracks delightfully, while the interior remains soft and chewy. The sprinkles add an extra layer of crunch, turning each bite into a surprise.
- Visual Appeal: The rainbow sprinkles give the cookies a festive look that feels like a party in a jar. The bright colors contrast beautifully with the dark chocolate chips, making them Instagram‑ready.
- Ease of Preparation: The recipe requires only basic pantry staples and a few extra steps that are quick and straightforward. Even novice bakers will find this method approachable.
- Uniqueness: Few cookie recipes combine Oreos, chocolate chips, and confetti in one batter. This combination is a fresh twist that sets the cookies apart from the ordinary.
- Crowd Reaction: Friends and family will be amazed by the flavor profile and the playful appearance. The cookies are perfect for gatherings, and the recipe is guaranteed to become a conversation starter.
- Make‑Ahead Potential: The dough can be frozen before baking, allowing you to have fresh cookies anytime. The cookies also store well, maintaining their texture for up to a week.
- Ingredient Quality: Using high‑quality Oreos, premium chocolate chips, and real butter ensures that every bite is rich and authentic.
Inside the Ingredient List
The Flavor Base
All-purpose flour is the backbone of these cookies, providing structure while keeping the dough tender. It absorbs the butter and sugars, allowing the flavors to meld. Skipping flour would result in a batter that spreads too thin and lacks bite.
White sugar contributes a clean sweetness that balances the richness of the butter and Oreos. It also caramelizes during baking, giving the cookies a subtle golden hue. If you prefer a deeper flavor, you can replace half of the white sugar with brown sugar.
Brown sugar adds moisture and a hint of molasses flavor that enhances the chocolate chips. It also helps the cookies maintain softness even after cooling. Omitting brown sugar will make the cookies slightly drier.
The Texture Crew
Baking soda and baking powder are the leavening agents that lift the dough, giving the cookies a light, airy interior. Baking soda also reacts with the acidic Oreo crumbs, creating tiny bubbles that make the cookies fluffy. If you use too much baking soda, the cookies may spread excessively.
Salt is essential for flavor enhancement; it sharpens the sweetness and balances the butter’s richness. A pinch of salt is enough, but too much will make the cookies taste overly salty. If you’re avoiding sodium, use a low‑sodium baking soda instead.
Unsalted butter provides the buttery flavor that’s central to this recipe. It also contributes to the crisp edges and chewy center. If you use salted butter, reduce the added salt to avoid an overly salty finish.
The Unexpected Star
Oreo crumbs are the secret weapon that gives these cookies a cookie‑butter depth. They also add a subtle crunch that contrasts with the soft chocolate chips. If you don’t have Oreos, you can use cookie crumbs from any chocolate sandwich cookie.
Rainbow sprinkles bring color, crunch, and a playful twist. They also add a slight sweetness that complements the chocolate. If you’re gluten‑free, use gluten‑free sprinkles to keep the cookies compliant.
The Final Flourish
Chocolate chips are the classic touch that keeps the cookie familiar and beloved. They melt slightly during baking, creating pockets of chocolatey goodness. For a richer flavor, you can use dark chocolate chips or a mix of dark and milk.
Eggs bind the ingredients together and add moisture, resulting in a tender crumb. They also help the cookies rise slightly and set their shape. If you’re vegan, use flaxseed or chia egg as a substitute.
Vanilla extract enhances the overall flavor profile, making the cookies feel more aromatic and complex. A small amount goes a long way, so don’t skip it. For a subtle twist, try almond extract instead.
Everything's prepped? Good. Let's get into the real action.
The Method — Step by Step
- Step 1: Preheat the Oven Set your oven to 350°F (175°C) and line a baking sheet with parchment paper. The precise temperature ensures even baking and golden edges. I always preheat the oven for at least 10 minutes to lock in the temperature.
- Step 2: Whip the Butter and Sugars In a large bowl, beat the softened butter with the white and brown sugars until the mixture is light and fluffy. The butter must be at room temperature; otherwise, the sugars won’t incorporate properly. This creates the airy base that will carry the Oreo crumbs.
- Step 3: Add Eggs and Vanilla Crack the eggs one at a time, beating well after each addition, then stir in the vanilla extract. The eggs bind everything together and add richness. If you’re in a hurry, you can whisk the eggs in a separate bowl before adding them to the butter mixture.
- Step 4: Sift Dry Ingredients In a separate bowl, whisk together the flour, baking soda, baking powder, and salt. Sifting eliminates clumps and ensures even distribution of leavening agents. This step is critical for a uniform rise.
- Step 5: Combine Wet and Dry Mixtures Gradually fold the dry ingredients into the wet mixture until just combined. Overmixing can make the cookies tough. The dough should be thick but spreadable.
- Step 6: Fold in Oreo Crumbs, Chocolate Chips, and Sprinkles Gently stir in the crushed Oreos, chocolate chips, and rainbow sprinkles. The Oreos should be evenly distributed to avoid clumps. The sprinkles add color and a delightful crunch.
- Step 7: Scoop the Dough onto the Baking Sheet Use a cookie scoop or tablespoon to drop rounded dough onto the prepared sheet, spacing them about 2 inches apart. The dough should be uniform in size for even baking. Watch the edges start to lift as the cookies bake.
- Step 8: Bake the Cookies Place the tray in the preheated oven and bake for 10–12 minutes, or until the edges are golden brown and the centers look set. The cookies will appear slightly underbaked in the center, which is the sweet spot. Avoid opening the oven door too often.
- Step 9: Cool on the Sheet Remove the tray and let the cookies cool on the sheet for 5 minutes. The cookies will firm up and are easier to move. This step prevents them from breaking apart when transferred.
- Step 10: Transfer to a Wire Rack Move the cookies to a wire rack to cool completely. The air circulation keeps the bottoms from becoming soggy. When they’re fully cooled, the sprinkles will have settled beautifully.
- Step 11: Serve or Store Serve the cookies warm or at room temperature. Store them in an airtight container for up to a week or freeze for longer storage. The cookies stay fresh and maintain their texture.
That's it — you did it. But hold on, I've got a few more tricks that'll take this to another level. The next section will reveal insider secrets that even seasoned bakers might not know.
Insider Tricks for Flawless Results
The Temperature Rule Nobody Follows
Many bakers believe that higher temperatures always yield better cookies, but the truth is that a steady 350°F allows the batter to rise evenly and the edges to caramelize without drying out the center. I’ve experimented with 325°F, and the cookies came out too soft and spread too far. Stick to 350°F, and you’ll get that perfect balance of chewy center and crisp edges.
Why Your Nose Knows Best
The aroma that rises from the oven is a reliable indicator of doneness. When the cookies smell nutty and slightly caramelized, they’re ready to come out. I once left a batch in the oven for an extra minute and the scent changed to burnt sugar, signaling a missed cue. Trust your nose, and you’ll never overbake again.
The 5-Minute Rest That Changes Everything
After baking, let the cookies rest on the sheet for exactly five minutes before moving them. This short rest allows the structure to set, making the cookies easier to handle. If you transfer them too soon, the chocolate chips might slide out, and the cookies could break apart.
Use a Food Processor for Oreo Crumbs
Crushing Oreos by hand can be messy and uneven. A food processor gives you a fine, consistent crumb that blends seamlessly into the dough. I’ve saved countless hours by using a processor, and the cookies taste better because the crumbs are evenly distributed.
Chill the Dough for Cheaper Cookies
Chilling the dough for 30 minutes before baking reduces spread and creates a thicker cookie with a more pronounced crunch. The dough becomes easier to scoop, and the flavors meld together during the rest period. If you’re short on time, skip this step, but the result will still be delicious.
Add a Splash of Milk for Extra Moisture
A tablespoon of milk added to the batter before baking can make the cookies slightly softer and more moist. This trick is especially useful if you’re using a high-protein flour or if your cookies have turned out a bit dry. Just stir in the milk and continue with the recipe as usual.
Creative Twists and Variations
This recipe is a playground. Here are some of my favorite ways to switch things up:
Dark Chocolate Oreo Funfetti
Swap the milk chocolate chips for dark chocolate chips and use dark Oreos. The result is a richer, slightly bittersweet cookie that pairs beautifully with a glass of red wine.
Coconut Crunch Delight
Add a cup of shredded coconut to the dough for a tropical twist. The coconut adds a subtle sweetness and a chewy texture that complements the chocolate chips.
Minty Fresh Variation
Stir in a teaspoon of peppermint extract and sprinkle crushed mint candy on top before baking. The mint flavor gives the cookies a refreshing aftertaste that’s perfect for spring.
Nutty Oreo Surprise
Incorporate a cup of chopped walnuts or pecans into the batter. The nuts add crunch and a buttery flavor that pairs well with the Oreo crumbs.
Vegan Version
Replace the butter with coconut oil, use flaxseed eggs, and choose vegan chocolate chips. The cookies remain chewy and flavorful, and the vegan audience can enjoy them without compromise.
Low-Sugar Alternative
Use a sugar substitute like erythritol or a blend of stevia and sugar. The cookies will still be sweet, but with fewer calories. Just keep an eye on the baking time, as sugar substitutes can affect browning.
Gluten-Free Adaptation
Swap the all-purpose flour for a gluten-free blend that includes xanthan gum. The cookies will be slightly denser but still delicious. Be sure to use a gluten-free baking powder to maintain leavening.
Storing and Bringing It Back to Life
Fridge Storage
Store the cooled cookies in an airtight container at room temperature for up to seven days. The container should be sealed to keep the cookies from drying out and to preserve the crunch of the sprinkles.
Freezer Friendly
For longer storage, place the cooled cookies on a parchment-lined tray and freeze until solid, then transfer to a freezer bag. They’ll keep for up to three months without losing flavor or texture.
Best Reheating Method
To revive frozen cookies, pop them in a preheated 350°F oven for 5 minutes. If they feel dry, add a tiny splash of water to the bottom of the pan to create steam, which restores moisture and softens the interior.