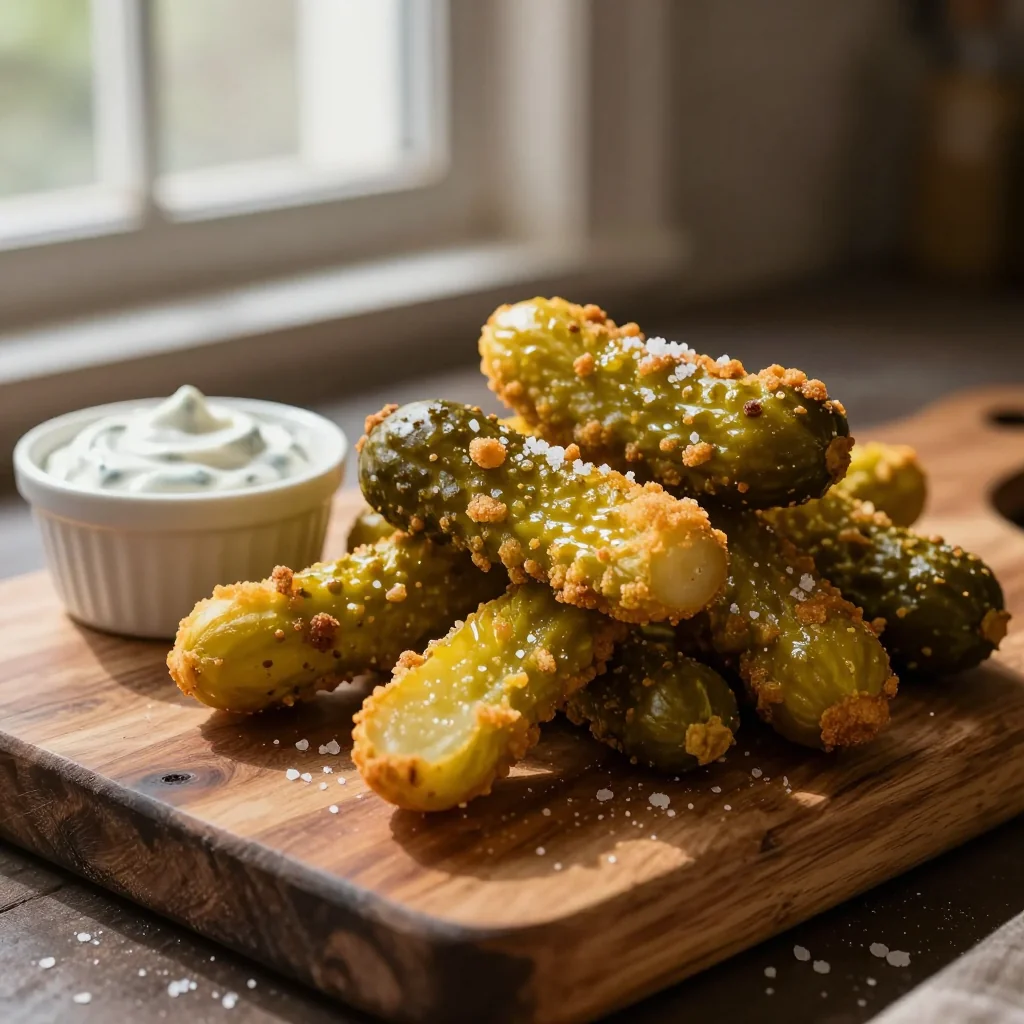
A tangy, crunchy snack that turns humble pickles into a show‑stopping appetizer.
Imagine a summer evening on the porch, the scent of a grill drifting through the air, and a bowl of golden, crackling pickles sitting beside a creamy ranch dip that beckons you to dip, bite, and savor. That’s exactly the moment I first discovered the magic of fried pickles during a road trip through the Midwest, where a small family diner served them as a surprise side. The first bite was an explosion of tangy brine, buttery crunch, and a whisper of spice that danced on my palate. I was instantly hooked.
Fried pickles have a modest origin: they began as a humble bar snack in the Southern United States, a clever way to stretch limited ingredients into something indulgent. Over time, they evolved into a beloved appetizer across the country, celebrated for their perfect balance of sour and salty, crisp and tender. Today, they’re a staple at tailgate parties, game nights, and casual gatherings, offering a playful twist on the classic pickle.
In this article, I’ll walk you through every step of creating perfectly crispy pickles, from the brine‑infused batter to the golden frying technique, and I’ll reveal my secret ranch dip recipe that adds a cool, herbaceous finish. You’ll learn why each ingredient matters, how to achieve a flawless crunch without sogginess, and tips for customizing the flavor to suit any palate.
So roll up your sleeves, preheat the oil, and let’s transform ordinary pickles into a crowd‑pleasing masterpiece that will have everyone reaching for seconds.
🌟 Why This Recipe Will Captivate You
From the first sizzle to the final dip, this dish delivers texture, flavor, and a dash of nostalgia—all in one bite.
- ✨ Perfect Crunch Every Time: The combination of flour, cornmeal, and a chilled batter creates a light, airy crust that stays crisp even after a brief rest.
- ✨ Tangy Meets Creamy: The briny pickle core is balanced by a cool, herb‑laden ranch dip, offering a harmonious flavor contrast that keeps you reaching for more.
- ✨ Quick and Easy Prep: With just a handful of pantry staples and a short 15‑minute prep, you can have a gourmet‑style appetizer ready in under half an hour.
- ✨ Versatile for Any Occasion: Whether you’re hosting a game night, a backyard BBQ, or a casual dinner, these pickles fit seamlessly into any menu.
- ✨ Kid‑Friendly Fun: The familiar shape of pickles combined with a playful crunch makes it a hit with younger diners who might otherwise shy away from vegetables.
- ✨ Budget‑Friendly Ingredients: All components are inexpensive, yet the result feels indulgent—perfect for feeding a crowd without breaking the bank.
🥗 The Ingredients
📝 Complete Ingredient List
For the Pickles:
For the Ranch Dip:

🔍 Focus on Key Ingredients
Dill Pickles
Dill pickles bring a bright, vinegary tang that cuts through the richness of the fried batter. Choose spears that are firm and still have a snap when bent; this ensures they hold up during the brief fry without turning mushy. The brine also helps the batter adhere, creating that signature crackly surface.
Buttermilk
Buttermilk is the secret to a tender, slightly tangy coating. Its acidity softens the gluten in the flour, resulting in a lighter crust, while its fat content adds richness. If you don’t have buttermilk, you can make a quick substitute by adding one tablespoon of lemon juice or vinegar to a cup of milk.
Cornmeal
Cornmeal adds texture and a subtle corn flavor that pairs beautifully with the dill. It also contributes to the golden hue of the crust. For an even finer crunch, you can blend half the cornmeal into a finer powder before mixing.
🔄 Quick Substitutions
| If you don’t have... | Use instead... |
|---|---|
| Buttermilk | Milk + 1 tbsp lemon juice |
| Dill Pickles | Pickle chips (cut into bite‑size pieces) |
| Cornmeal | Polenta (fine grind) or panko breadcrumbs |
👨🍳 Step‑by‑Step Instructions
Follow these detailed steps to achieve perfectly crispy pickles and a velvety ranch dip that will impress every guest.
📋 Phase 1: Preparation & Mise en Place
Start by gathering and prepping all components before the oil heats.
Slice and Soak the Pickles
Trim the ends off each pickle spear, then slice them into ½‑inch thick rounds. Place the slices in a bowl, cover with cold water, and let them sit for 5 minutes. This brief soak removes excess surface salt, ensuring the batter adheres evenly without becoming overly salty.
Marinate in Buttermilk
Transfer the dried pickle slices to a shallow dish and pour the 240 ml of buttermilk over them. Toss gently to coat each piece. Let them sit for 10 minutes; the buttermilk will lightly tenderize the outer layer while infusing a subtle tang.
🔥 Phase 2: Frying & Assembly
Heat, coat, and fry the pickles to golden perfection.
Prepare the Batter
In a large mixing bowl, whisk together the flour, cornmeal, paprika, garlic powder, onion powder, salt, and black pepper. The mixture should be uniform and free of lumps. Add a splash of cold water (about 30 ml) to achieve a thick yet pourable consistency—think of pancake batter but a touch denser.
Heat the Oil
Pour vegetable oil into a deep, heavy‑bottomed skillet to a depth of about 2 inches. Heat the oil over medium‑high heat until it reaches 180 °C (350 °F). Use a kitchen thermometer for accuracy; the right temperature ensures a quick seal that prevents the pickles from soaking up oil.
Coat the Pickles
Remove each pickle slice from the buttermilk, letting excess drip off. Dredge the slice in the batter, ensuring an even coating. For extra crunch, double‑dip: return the coated slice briefly to the buttermilk, then back into the batter.
Fry Until Golden
Gently lower the battered slices into the hot oil using tongs. Fry for 2‑3 minutes, turning once, until the crust is a deep golden‑amber and the pickles are heated through. Remove with a slotted spoon and place on a paper‑towel‑lined plate to drain.
✨ Phase 3: Finishing Touches & Serving
Combine the dip and plate the dish for maximum impact.
Make the Ranch Dip
In a bowl, whisk together mayonnaise, sour cream, dried dill, garlic powder, onion powder, and lemon juice. Season with salt and pepper to taste. Chill for at least 10 minutes to allow flavors to meld.
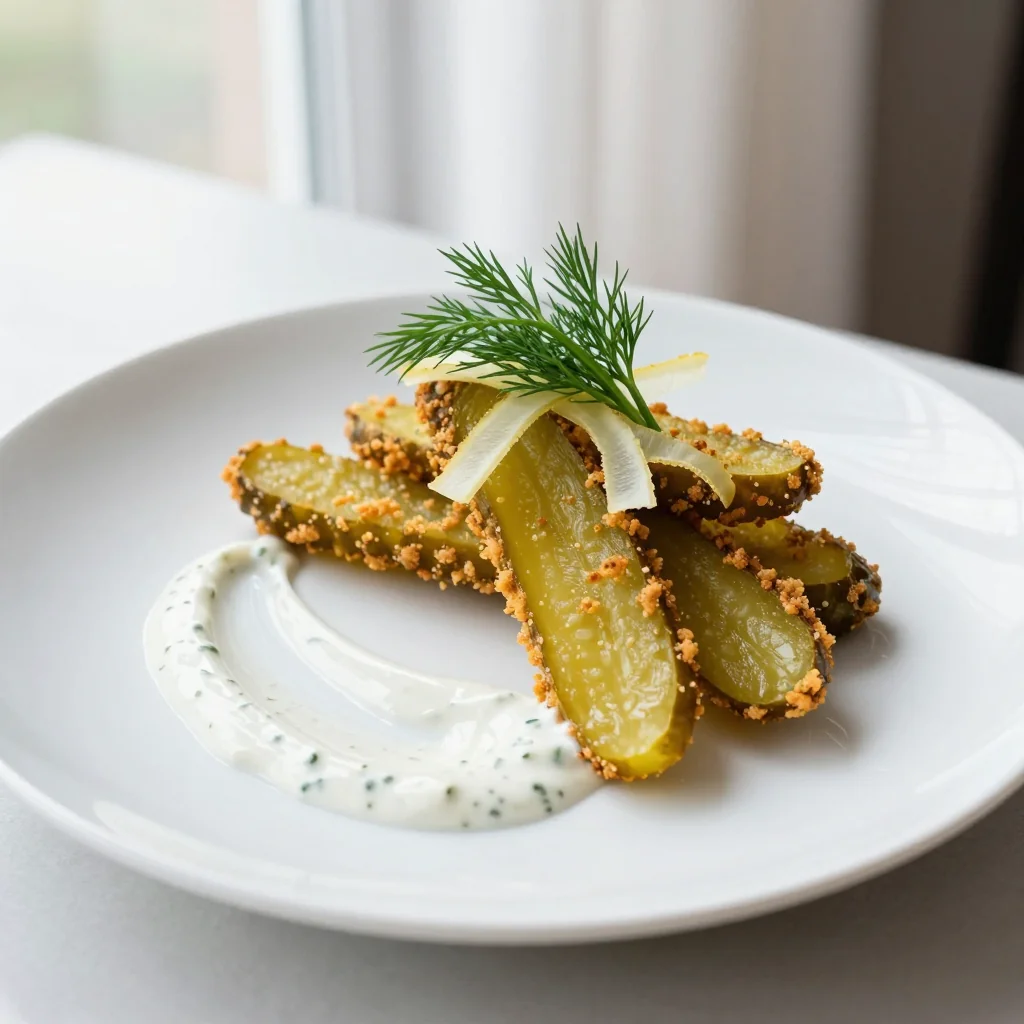
Plate the Pickles
Arrange the fried pickles on a serving platter, sprinkling a pinch of extra paprika for color. Serve alongside a generous bowl of ranch dip, optionally garnished with a few fresh dill sprigs for visual appeal.
Final Check
Give the pickles a quick taste—if the crust feels too soft, a brief second fry (30 seconds) can restore crunch. Ensure the dip is creamy and balanced; adjust with a splash more lemon juice if needed.
Serve & Enjoy
Present the platter hot, encouraging guests to dip each bite into the cool ranch. Pair with a crisp lager or a citrusy white wine for the ultimate snack experience.
💡 Expert Tips & Tricks
🛒 Choosing the Right Ingredients
When selecting pickles, opt for those that are refrigerated rather than shelf‑stable, as they retain a firmer texture. Look for spears that are uniformly sized; this ensures even cooking. For the batter, using a mixture of flour and cornmeal creates a layered crunch that pure flour alone cannot achieve. Fresh herbs like dill add brightness to the dip, while high‑quality mayonnaise yields a smoother texture.
🔪 Preparation Techniques
Dry the pickle slices thoroughly after soaking—any residual moisture will cause the batter to steam rather than fry, resulting in soggy crusts. A double‑dip technique (buttermilk → batter → buttermilk → batter) creates a thicker coating that stays crisp longer. Keep the batter chilled; a cold batter hits the oil harder, forming a quicker seal.
🌡️ Mastering the Frying Process
Maintain oil temperature between 175‑185 °C (350‑365 °F). If the temperature drops too low, the coating will absorb excess oil and become greasy. Use a thermometer and adjust heat as needed. Fry in small batches to avoid crowding, which can lower the oil temperature dramatically.
🍽️ Presentation & Service
Serve the pickles on a dark slate board to highlight the golden hue. Add a drizzle of extra ranch in a decorative swirl and garnish with fresh dill or a sprinkle of smoked paprika for visual contrast. Provide small dipping bowls for individual guests to keep the platter tidy.
🏆 Pro Tips
Elevate your fried pickles from great to restaurant‑level with these professional insights.
- 🎯 Use a Temp‑Controlled Fryer: Consistent temperature eliminates guesswork, ensuring each slice reaches the perfect crust without overcooking the interior.
- 🎯 Add a Pinch of Baking Powder: Incorporating ½ tsp of baking powder into the batter creates micro‑bubbles that expand during frying, yielding an ultra‑light, airy crunch.
- 🎯 Finish with a Light Dusting of Sea Salt: A fine sea salt added just after frying enhances flavor without making the crust soggy.
- 🎯 Chill the Pickles After Frying: Placing the fried pickles on a wire rack for a few minutes allows excess oil to drip away, preserving crispness.
- 🎯 Infuse the Ranch with Fresh Herbs: Blend a tablespoon of finely chopped chives or parsley into the dip for an extra layer of freshness.
- 🎯 Serve Immediately: Fried foods lose crunch quickly; timing the service within 10 minutes of frying guarantees the best texture.
"The secret to any great fried food is a hot oil bath and a cold batter—master both and you master the crunch." — Chef Thomas Keller
🔄 Variations & Adaptations
The beauty of this recipe lies in its flexibility. Whether you crave heat, want to keep it vegan, or need a low‑calorie version, there’s a tweak for every palate.
🥬 Vegetarian/Vegan Version
Replace the dairy‑based buttermilk with a plant‑based alternative such as almond milk mixed with a tablespoon of lemon juice. Use a vegan mayo and dairy‑free sour cream for the dip, and swap the dried dill for fresh cilantro for a slightly different herb profile.
- Vegan buttermilk substitute: 240 ml almond milk + 1 tbsp lemon juice.
- Vegan dip: 120 g vegan mayo + 120 g coconut‑based sour cream.
🌶️ Flavor Variations
Play with the spice profile to match your mood or the theme of your gathering.
Spicy Kick
Add ½ tsp cayenne pepper to the batter and a dash of hot sauce to the ranch dip for a fiery bite.
Mediterranean Twist
Incorporate 1 tsp dried oregano into the batter and replace the dill in the dip with 1 tsp chopped sun‑dried tomatoes and a squeeze of olive oil.
Asian Fusion
Swap paprika for 1 tsp five‑spice powder, and blend 1 tsp toasted sesame oil into the dip along with a splash of soy sauce.
⚠️ Dietary Adaptations
Gluten‑Free
Use a blend of rice flour and cornstarch in place of all‑purpose flour, and ensure the cornmeal is certified gluten‑free.
Lactose‑Free
Swap sour cream for lactose‑free yogurt and use a dairy‑free mayo for the dip.
Low‑Calorie
Shallow‑fry the pickles in a non‑stick skillet with a light spray of oil, and use Greek yogurt instead of mayonnaise to cut calories while retaining creaminess.
👶 Family/Children Friendly
Kids love the familiar shape and mild flavor. Reduce the amount of paprika and omit the black pepper for a milder crust. Serve with a simple ketchup‑yogurt dip for picky eaters.
📦 Storage & Reheating
🧊 Conservation
In the Refrigerator:
- Duration: 2 days
- Recommended container: Airtight glass jar
- Tip: Store the dip separately to prevent sogginess.
In the Freezer:
- Duration: 1 month
- Method: Flash‑freeze the fried pickles on a tray, then transfer to a zip‑top bag.
- Defrosting: Thaw in the refrigerator overnight, then re‑crisp in a hot oven.
💡 For best texture, reheat rather than eat cold; the crispness revives after a brief oven blast.
♨️ Reheating
🔥 Oven (Recommended):
- Preheat to 190 °C (375 °F).
- Spread pickles on a baking sheet lined with parchment.
- Heat for 8‑10 minutes, then flip and heat another 5 minutes.
- Remove and serve immediately for renewed crunch.
⚡ Microwave (Quick):
- Place pickles on a microwave‑safe plate, cover with a paper towel.
- Heat on medium power for 45 seconds.
- Check crispness; repeat in 15‑second bursts if needed.
🍳 Skillet:
Heat a thin layer of oil over medium heat, add the pickles for 2‑3 minutes, turning once, until the crust regains its golden sheen.
🍷 Perfect Pairings
🥗 Side Dishes
- Coleslaw with Apple Cider Vinaigrette: The creamy, tangy slaw balances the salty crunch of the pickles.
- Grilled Corn on the Cob: Sweet charred corn adds a smoky contrast.
- Loaded Potato Wedges: Crispy wedges with cheddar and bacon round out the snack platter.
🍷 Wine & Beverage Pairings
- American Pale Ale: Its light bitterness cuts through the richness.
- Dry Riesling: The acidity mirrors the pickle’s tang.
- Non‑Alcoholic: Sparkling water with a splash of lime keeps the palate refreshed.
🍰 Complementary Courses
Start with a crisp garden salad dressed in a citrus vinaigrette, follow the fried pickles with a light lemon sorbet, and finish with a decadent chocolate mousse for a balanced dining experience.
❓ Frequently Asked Questions
Q: Can I use other types of pickles?
A: Absolutely! Bread‑and‑butter pickles provide a sweeter flavor, while kosher dill offers a stronger garlic note. Adjust the seasoning in the batter accordingly—less salt for sweeter pickles and perhaps a pinch more paprika for tangier varieties.
Q: How do I know when the oil is hot enough?
A: A kitchen thermometer is the most reliable method. Aim for 180 °C (350 °F). If you don’t have one, drop a tiny bit of batter into the oil; it should sizzle and rise to the surface within a few seconds without turning brown immediately.
Q: What if I don’t have cornmeal?
A: Substitute with fine polenta, panko breadcrumbs, or even crushed cornflakes for a similar texture. Each alternative will slightly alter the flavor profile, but the crunch remains.
Q: My batter becomes too runny—what’s wrong?
A: The batter should coat the back of a spoon. If it’s too thin, add a little more flour or cornmeal. Conversely, if it’s too thick, thin with a splash of cold water or extra buttermilk.
Q: Can I make this recipe ahead of time?
A: Yes. Prepare the batter and dip up to 2 hours in advance and keep them refrigerated. Fry the pickles just before serving for maximum crispness.
Q: How do I store leftover ranch dip?
A: Transfer the dip to an airtight container and refrigerate. It stays fresh for up to 5 days. Stir before serving to re‑incorporate any settled ingredients.
🎉 To Your Kitchen!
There’s something undeniably satisfying about turning a simple jar of pickles into a golden, crackling indulgence that pairs perfectly with a cool, herbaceous dip. This recipe brings together the tang of the brine, the buttery richness of the batter, and the creamy comfort of ranch, creating a snack that feels both familiar and exciting. Whether you’re feeding a crowd at a game night or just treating yourself after a long day, the balance of textures and flavors will keep you coming back for more.
Remember, the key to success lies in a hot oil bath, a chilled batter, and a quick fry—simple steps that yield spectacular results. Don’t be afraid to experiment with the variations, adapt them to your dietary needs, and make the dish truly your own. The kitchen is your playground, and these pickles are your canvas.
Have you tried this recipe?
Leave a comment and rating below! Share your photos on Instagram with #CrispyPicklesMagic for a chance to be featured.
Crispy Fried Pickles with Ranch Dip
Golden, crunchy pickles served with a cool, herbaceous ranch dip.
📝 Ingredients
Pickles
Batter
Ranch Dip
👨🍳 Instructions
- 1 Slice pickles, soak in cold water, then pat dry.
- 2 Marinate in buttermilk for 10 minutes.
- 3 Whisk together dry batter ingredients.
- 4 Heat oil to 180 °C (350 °F).
- 5 Coat pickles in batter (double‑dip optional).
- 6 Fry until golden, about 2‑3 minutes per side.
- 7 Mix ranch dip ingredients, chill.
- 8 Arrange fried pickles on a platter, garnish.
- 9 Serve with dip, enjoy immediately.
- 10 Store leftovers according to storage guidelines.