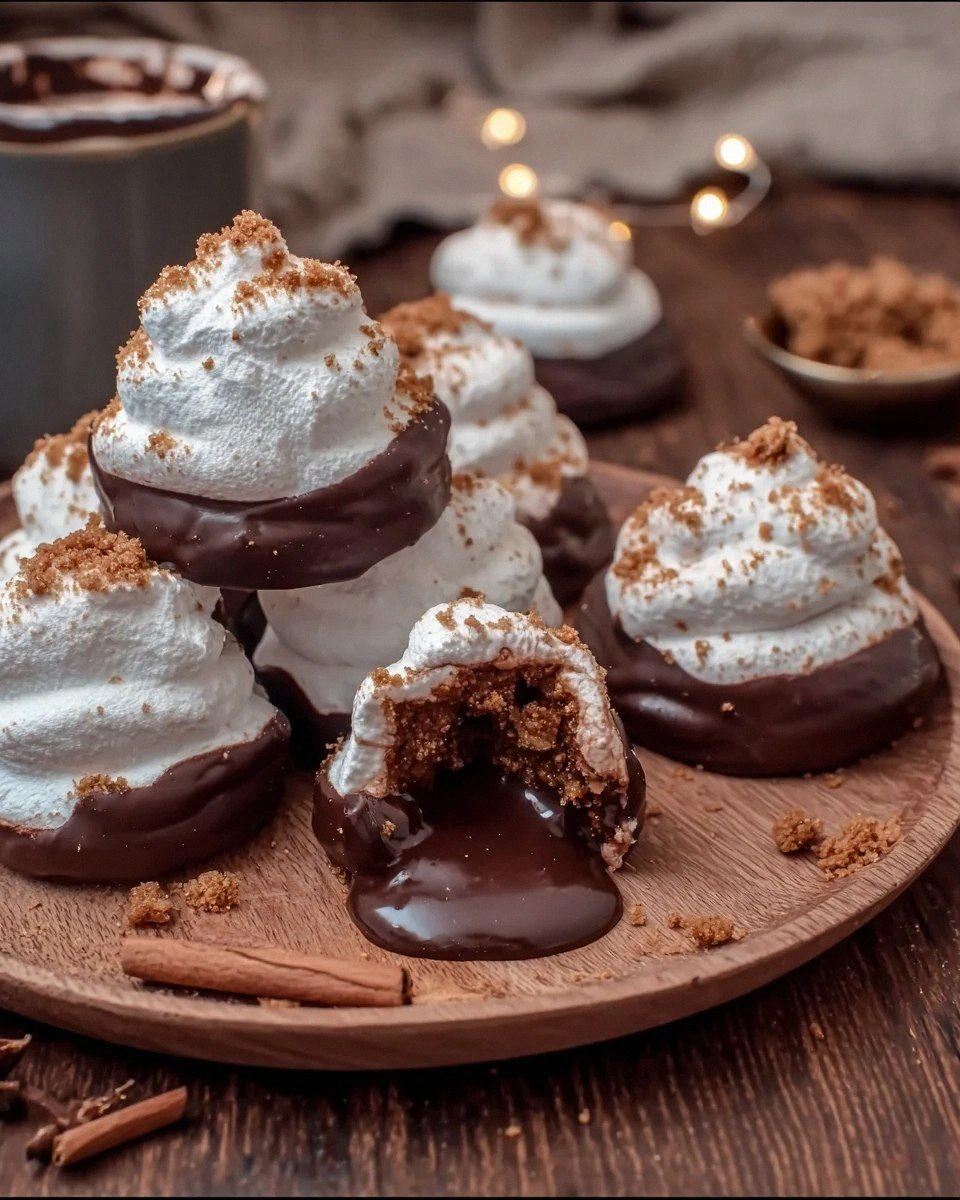
I still remember the year I tried to impress my future in-laws with store-bought marshmallows floating in hot cocoa on Christmas Eve. The silence around the fireplace was deafening. My mother-in-law took one polite bite, set her mug down, and changed the subject to the weather. That night, I swore I'd never serve sad, flavorless puffs again. Fast-forward twelve months and I was elbow-deep in a mixing bowl, whisking molten sugar like my life depended on it, the air thick with ginger, cinnamon, and clove. The first batch disappeared before the candy even cooled; my father-in-law ate six squares straight off the cutting board and asked if I was accepting pre-orders for next year. These gingerbread marshmallows are the edible version of a Christmas miracle: billowy, fragrant, and shot through with the kind of warmth that makes people close their eyes and sigh.
Picture this: your kitchen windows fogged against the December cold, the radio humming Mariah Carey, and a sheet of snowy-white candy setting on the counter like a winter landscape. The scent is so heady—dark molasses, zesty ginger, a whisper of nutmeg—that neighbors will invent excuses to drop by. When you drop one cube into steaming cocoa, it melts into silken ribbons, perfuming the drink like a spice market in a snow globe. I dare you to taste one straight from the cutting board and not go back for seconds; I’ve seen grown adults hoard them in napkin-lined pockets "for the drive home."
Most homemade marshmallows are cloyingly sweet, one-note sugar bombs that leave your tongue feeling sand-blasted. Mine borrow the swagger of classic gingerbread: deep molasses backbone, peppery ginger heat, and a sparkle of citrus to keep things bright. The texture is cloud-soft yet holds a clean edge when you slice it—no stick-to-the-knife disasters here. And because I’m a firm believer in kitchen magic, I whip the syrup to exactly 240°F, the sweet spot where sugar becomes stretchy silk. Miss that temperature and you’ll either pour concrete or soup; hit it and you’ll understand why candy-making was once considered sorcery.
Stay with me here—this is worth it. You’ll learn the cold-water trick that tells you when your syrup is ready without a thermometer, the cocoa-powder dusting that keeps the cubes from turning into glue, and the make-ahead hack that lets you knock out a double batch for last-minute gifts. By the end, you’ll wonder how you ever settled for those jet-puffed imposters from a plastic bag. Ready for the game-changer? Let’s roll.
What Makes This Version Stand Out
Molasses Magic: Instead of corn syrup alone, I fold in dark molasses for that unmistakable gingerbread swagger. The result is marshmallows with toasty depth, not cavity-inducing sweetness.
Triple-Ginger Punch: Fresh ginger juice, ground ginger, and a whisper of crystallized ginger give you heat, perfume, and tiny pops of chewy spice—like a symphony instead of a single off-key note.
Citrus Halo: A whisper of orange zest lifts the whole profile, cutting through sugar the way a squeeze of lemon brightens seafood. Skip it and the flavor feels like it’s wearing a wet wool sweater—heavy and dull.
Cloud-Soft Texture: We whip the meringue-style base for a full twelve minutes. That extra aeration creates bubbles so tiny they feel like silk on your tongue yet strong enough to hold a sharp cube edge.
No Thermometer Needed: I’ll teach you the ice-water test so you can trash that finicky gadget. When the syrup forms a soft ball you can flatten between your fingers, you’re golden.
Gift-Ready Stability: These cure for six hours until the surface feels like suede, meaning you can stack them in mason jars or parchment parcels without tragic squishage.
Alright, let’s break down exactly what goes into this masterpiece...
Inside the Ingredient List
The Flavor Base
Granulated Sugar: The backbone of any marshmallow, but here it’s more than just sweetness. It carries molasses without turning grainy, provided you dissolve every crystal before boiling. Buy the cheap stuff; save your fancy raw sugar for coffee. If you swap in honey, expect a softer set and a floral note that fights the ginger.
Dark Molasses: This is the soul of gingerbread. It brings iron-rich bitterness, a hint of smoke, and that antique-brown color that screams cozy holiday. Avoid blackstrap unless you want marshmallows that taste like licorice punishment. In a pinch, substitute barley malt syrup, but the flavor will lean malty rather than spicy.
Fresh Ginger: Micro-planed ginger releases volatile oils that powdered ginger can’t match. You’ll need two tablespoons, juice and all, for a bright, peppery top note. Choose plump rhizomes with taut skin; wrinkles mean the oils have evaporated. No fresh stuff? Submerge ground ginger in a teaspoon of hot water to bloom it, but know you’re trading vibrancy for convenience.
The Texture Crew
Gelatin Sheets: I prefer bronze-level sheets because they dissolve smoothly and leave zero rubber-band bounce. You’ll need eight sheets, bloomed in cold water until they feel like jellyfish. Powdered gelatin works—use 2.5 teaspoons per sheet—but bloom it gently; overheated gelatin loses its stretch. Vegetarians, agar will set firmer and won’t toast well, so save this recipe for a special-occasion cheat day.
Egg Whites: Optional but transformative. One whipped white folded into the syrup adds angel-food volume and keeps the interior feather-light. Skip it and you’ll still get great cubes, just denser, more like commercial marshmallows. Make sure the bowl is grease-free; a speck of yolk collapses the foam faster than a popped balloon.
The Unexpected Star
Orange Blossom Water: A quarter teaspoon perfumes the whole batch with a Mediterranean holiday vibe. It’s the culinary equivalent of opening windows after a stuffy winter car ride. Can’t find it? Use a scrap of orange peel blitzed with sugar in the food processor, then sift out the zest. Almond extract walks a similar path but can bully the ginger if you overdo it.
The Final Flourish
Cocoa Powder Dusting: Dutch-process cocoa absorbs surface moisture and keeps cubes from fusing into a tragic marshmallow monolith. It also photographs like snowy footprints on chocolate soil. If you hate the bitter edge, whisk in equal parts cornstarch and powdered sugar for a neutral cloak. Skip the dusting and you’ll need a chisel to separate your squares tomorrow.
Everything’s prepped? Good. Let's get into the real action...
The Method — Step by Step
- Prep Your Pan and Bloom Gelatin: Line an 8x8-inch square pan with parchment, leaving wings so you can lift the slab later. Spray lightly with neutral oil—this sounds fussy but trust me, you’ll thank yourself at 2 a.m. when you’re cutting tidy cubes. Submerge gelatin sheets in a bowl of ice water for five minutes; they should go from brittle to flubbery. Squeeze out excess water and stash the jellyfish in the bowl of a stand mixer fitted with the whisk. If you’re using powdered gelatin, sprinkle it over ¼ cup cool water and let it sponge.
- Build the Molasses Syrup: In a heavy saucepan, stir sugar, molasses, ½ cup water, and a pinch of salt until the mixture looks like wet sand. Resist the urge to crank the heat; instead, set it to medium and brush the inner walls with a wet pastry brush to wash down sugar crystals that could crystallize the whole pot. When the surface goes from cloudy to shiny, clip on a candy thermometer—or don’t. We’re going old-school: drop a teaspoon of syrup into a glass of ice water, fish it out, and flatten it between your fingers. If it forms a soft, pliable ball that holds shape yet smushes, you’re at 240°F. Pure magic.
- Whip Into Pillow Territory: With the mixer on medium, pour the hot syrup in a slow ribbon down the side of the bowl—avoid the spinning whisk or you’ll spin sugar threads across the ceiling. Once all in, crank to high and beat for ten full minutes. The bowl will go from nuclear-hot to barely warm, and the mixture will inflate like a tan balloon. Add bloomed gelatin and keep whipping another two minutes until the whisk leaves ribbon trails that sit on top without sinking. You’ll know you’re done when the meringue clings to the whisk in glossy peaks that bounce like trampoline parks.
- Fold in Aromatics: Stop the mixer, sift in ground ginger, cinnamon, nutmeg, and clove, then drizzle in fresh ginger juice and orange blossom water. Fold by hand with a silicone spatula, scraping the bottom to catch hidden pockets of spice. The batter will deflate slightly—don’t panic. Better to lose a little volume than to bite into a streak of spice that tastes like a sneeze.
- Pan, Smooth, and Wait: Scrape the sticky cloud into your lined pan. Oil your fingertips and gently press the surface level without crushing air pockets. Sift a 50/50 mix of cocoa and powdered sugar over the top to absorb moisture. Let the pan sit uncovered at room temperature for at least six hours, preferably overnight. Your patience will be rewarded with a marshmallow slab that feels like velvety suede when you tap it.
- Demold and Cut: Lift the parchment wings and invert the slab onto a cutting board dusted with more cocoa mix. Peel away parchment; the bottom will be tacky and perfect. Oil a long sharp chef’s knife or use a pizza wheel for straight edges. Cut into six strips, then rotate and cut across to make 36 bite-sized cubes. Toss the cubes in a bowl with extra dusting mix so every side gets a thin coat—this prevents the dreaded sticky handshake.
- Toast and Serve (Optional Showstopper): If you want that campfire vibe, spear a cube on a fondue fork and wave it over a gas burner for three seconds. The surface caramelizes into a delicate brûlée shell while the inside stays molten. Drop the toasted cube into hot cocoa and watch it melt into spicy swirls, or sandwich it between two gingersnaps with a sliver of dark chocolate for the world’s most decadent s’more. I’ve been honest—I ate half the batch before anyone else got to try it.
- Store for Future Joy: Pack cubes in an airtight tin, layered between parchment, and hide them on the top shelf. They’ll keep for two weeks at cool room temperature, though they rarely last past Boxing Day. Humidity is the enemy; if your kitchen is tropical, slip a few silica packets into the tin. Future-you will thank present-you when mid-January cocoa cravings hit.
That's it—you did it. But hold on, I've got a few more tricks that'll take this to another level...
Insider Tricks for Flawless Results
The Temperature Rule Nobody Follows
Most recipes panic you into thinking 241°F equals volcanic ruin. Wrong. Anything between 235°F and 245°F yields edible marshmallows; the higher end just sets firmer. If you live at altitude, subtract two degrees for every 1,000 feet above sea level or you’ll carve granite. And don’t re-boil syrup if you overshoot—add a tablespoon of hot water, swirl, and retest. A friend tried skipping this step once; let’s just say it didn’t end well for her stand mixer paddle.
Why Your Nose Knows Best
When the syrup turns from sharp sugar vapor to toasty caramel aroma, you’re thirty seconds from the finish line. Trust the smell more than the dial. I once had a candy thermometer lie to me—turns out the calibration nut had slipped. My nose saved the batch, and now I cook with ears and nose as much as eyes. If you smell roasted nuts, you’ve gone too far; start over, because burnt molasses tastes like bitter regret.
The 5-Minute Rest That Changes Everything
After you pour the mixture into the pan, walk away for five full minutes before dusting the top. This brief rest allows surface bubbles to pop, giving you a satin finish instead of lunar craters. I use the time to rinse the sticky pot—hot water melts sugar like snow in July. Come back, sift your cocoa mix, and you’ll see a perfectly flat canvas ready for its close-up.
Knife Oiling Without the Mess
Dip a folded paper towel in neutral oil, grip it with tongs, and swipe the blade between cuts. You get a micro-thin coating that prevents drag without leaving greasy slicks on your squares. Skip the cooking spray; it propels oil droplets across the counter and you’ll slip like a cartoon character next time you reach for a mug.
Flavor Layering for Addicts
Want a darker edge? Replace one tablespoon of molasses with blackstrap. Craving smoky intrigue? Stir in a drop of liquid hickory smoke—seriously, one drop, or you’ve made campfire bacon. Need kid-friendly sweetness? Swap orange blossom water for vanilla extract and dial ginger down by half. Each tweak creates a new tradition without rewriting the base formula.
Creative Twists and Variations
This recipe is a playground. Here are some of my favorite ways to switch things up:
Peppermint Bark Marshmallows
Swap molasses for corn syrup, replace ginger with ½ teaspoon peppermint extract, and fold in crushed candy canes at the end. The result tastes like December in a ski lodge—cool, crunchy, and absurdly festive. Dust with crushed peppermint instead of cocoa for a snowy sparkle. Kids lose their minds when these melt into hot chocolate and turn it candy-stripe pink.
Spiked Eggnog Edition
Replace water in the syrup with equal parts eggnog and dark rum. Add a whisper of freshly grated nutmeg and omit orange blossom water. The alcohol cooks off, leaving custardy aroma and a gentle warmth that makes adults hover near the kitchen. Serve these at holiday cocktail parties; they double as conversation starters and edible ice-breakers.
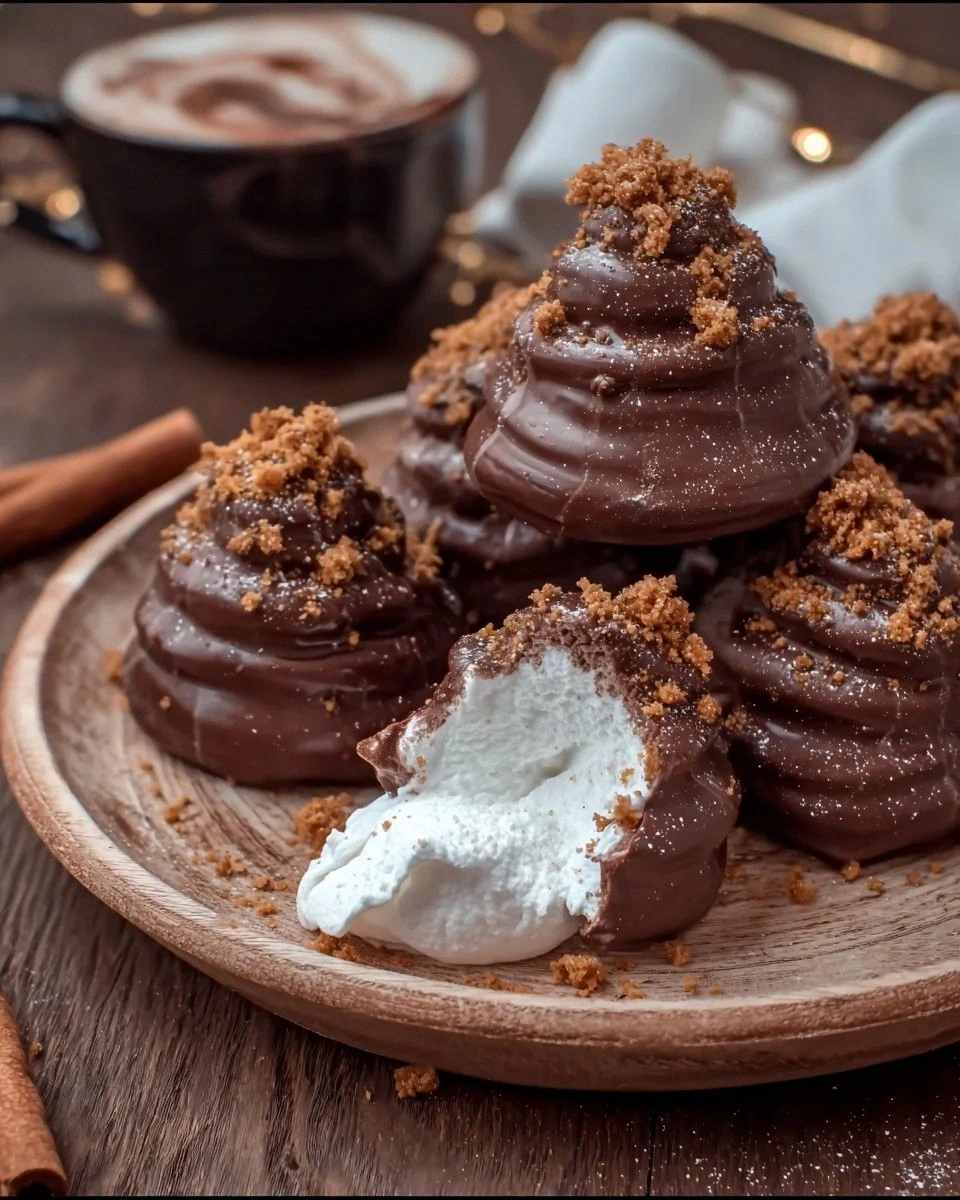
Chocolate-Swirl Gingerbread
Melt two ounces of bittersweet chocolate, cool slightly, and marble it through the marshmallow right before panning. The chocolate sets into thin ribbons that snap when you bite, giving textural contrast to all that fluff. It’s like a black-and-white cookie reimagined as a pillow fight. Warning: these disappear faster than you can say “Santa baby.”
Citrus-Pistachio Brittle Topping
Press a sheet of pistachio-orange brittle onto the surface right after smoothing the pan. When you flip the slab, you’ll have a shiny mosaic that cracks under the knife, embedding each cube with nutty shards. The bitter nuts balance the sweet marshmallow, and the green-red colors look like Christmas lights in edible form. Your guests will think you apprenticed under a Parisian pâtissier.
Maple Bourbon Bonfire
Sub maple syrup for half the sugar and bourbon for orange blossom water. The maple browns faster, so stop the syrup at 238°F. These taste like Vermont camping trips—smoky, woodsy, and just boozy enough to make caroling sound tuneful. Toast them over a fireplace for maximum theatrics; the flames kiss the edges into caramelized maple lace.
Vegan Clouds (Almost There)
Swap gelatin with aquafaba meringue plus agar, but expect a shorter shelf life and slightly chewy bounce. The flavor still sings, and dietary restrictions won’t derail anyone’s holiday joy. Keep them refrigerated and serve within four days—though they rarely last four hours in my house.
Storing and Bringing It Back to Life
Fridge Storage
Contrary to popular belief, these do not need refrigeration. In fact, the fridge introduces moisture that can make them weep sticky tears. Keep them in an airtight tin at cool room temperature, layered with parchment, for up to two weeks. If your kitchen routinely hits 80°F, stash the tin in the coolest cabinet, away from the oven.
Freezer Friendly
For long-term hoarding, freeze the cubes on a sheet pan until rock-solid, then tumble into a zip bag. They won’t freeze solid like ice cubes—more like frozen marshmallow memory foam. Thaw at room temp for fifteen minutes before serving; they bounce back like nothing happened. I’ve served these in July after a six-month deep freeze and guests swore they were fresh.
Best Reheating Method
Okay, you can’t reheat marshmallows, but you can revive their just-made fluffiness. Pop a cube in the microwave for three seconds—no more or you’ll inflate a sticky balloon animal. Alternatively, float them in hot liquid; the heat reactivates the gelatin matrix and they bloom back to dreamy softness. Add a tiny splash of water before reheating cocoa—it steams the marshmallow back to perfection without scalding the milk.